Friday, June 13, 2014

Red Solo Mugs

Red Solo Mugs. Just felt like making a set of them. I had the glazes and just did it. They're gone. Now I'm going to have to make a set for myself.

Tuesday, June 10, 2014

Ass Tray

I made another ash try. I had some more people ask for them. Talking over a few beers we came up with the idea of "ass trays" and ""ass buckets."
This one was actually just going to be a bucket with indentations for the butts on the rim but some how I came up with the idea of drilling holes on the sides so you can insert the burning cigarette. I thought it would be good for the outdoors. Seemed like a great idea.
This is 5 inches wide, 3 inches tall, decorated with Amaco majolica glazes and fired to cone 04.

Tuesday, May 13, 2014

Next in the plate series.

"The Scream." This is what I'm working on now. I think it is going to be my biggest challenge in the famous artwork plate series.
I have already thrown the plate and carved the basic lines into the plate. Yesterday I bisque fired the plate and today I plan to start painting.
I'm using majolica glazes like I have for all the other plates but I think it would be a lot easier using underglaze pencils. This is going to be a test of my brush stroke abilities.

Wednesday, May 07, 2014

Horse Hair Raku

This is my latest raku fired pot. I came across a bottle of ferric chloride in my studio and thought I'd give it a try.
First I threw and trimmed the pot and once it was leather hard I hand burnished the vase with the back of a metal spoon. I bisque fired it to cone 08, about 1700 degrees F.
Next step was the raku kiln. When fired to temp I pulled the glowing orange pot from the kiln with a set of tongs and set it on a soft kiln brick. I let it cool for about a minute or two and then applied strands of horse hair which burned on the pot and left the black marks. Next I put on a safety respirator and sprayed the ferric chloride onto the pot from an ordinary plastic spray bottle, which gave it the nice brownish color. To enhance the sheen I applied a light coat of paste wax and buffed it to make it more glossy.

Tuesday, May 06, 2014

Bad Day

Monday morning did not start off well. Two of my vases blew up in the bisque fire.  The force of the blasting shards cracked my latest famous artists plate. Have no idea how I brought the temperature up so quickly.
The plate is Franz Marc's "Blue Horse." I carved the image after I had trimmed the plate and it is surely one of the best I have done, so I was pretty pissed off when I hear the popping pot.
Good thing I didn't put my Edvard Munch plate in the same load. I Carved the image of "The Scream" into the plate the same way as this broken plate. I have a good feeling about it.
Anyway, it is time to throw another plate and carve the "Blue Horse" again.

Wednesday, April 23, 2014

Mondrian Plate

Piet Mondrian's "Composition II in Red Yellow and Blue." All I can say is that painting this was not as easy as I thought it would be. It was the black lines that was the difficult part.
I actually fired this plate three times. The first time I fired it to approximately cone 06 to harden up the white base coat of majolica glaze. Then I used scotch tape to mask-out the lines for the red, blue and yellow. Once painted I fired it again to cone 06.
Then I masked-out and painted the black lines and fired it to cone 04.

Tuesday, April 22, 2014

Andy Warhol Plate

Andy Warhol's bannana, another plate in my series of famous art of the 20th Century.
This plate is my favorite so far, I think because of its' simplicity.
I wasn't sure how this plate would come out of the kiln. The majolica glazes before firing are very dull and I just wasn't sure how the black would come out. Came out just fine! Looks like my my brushwork skills are improving.

Tuesday, April 15, 2014

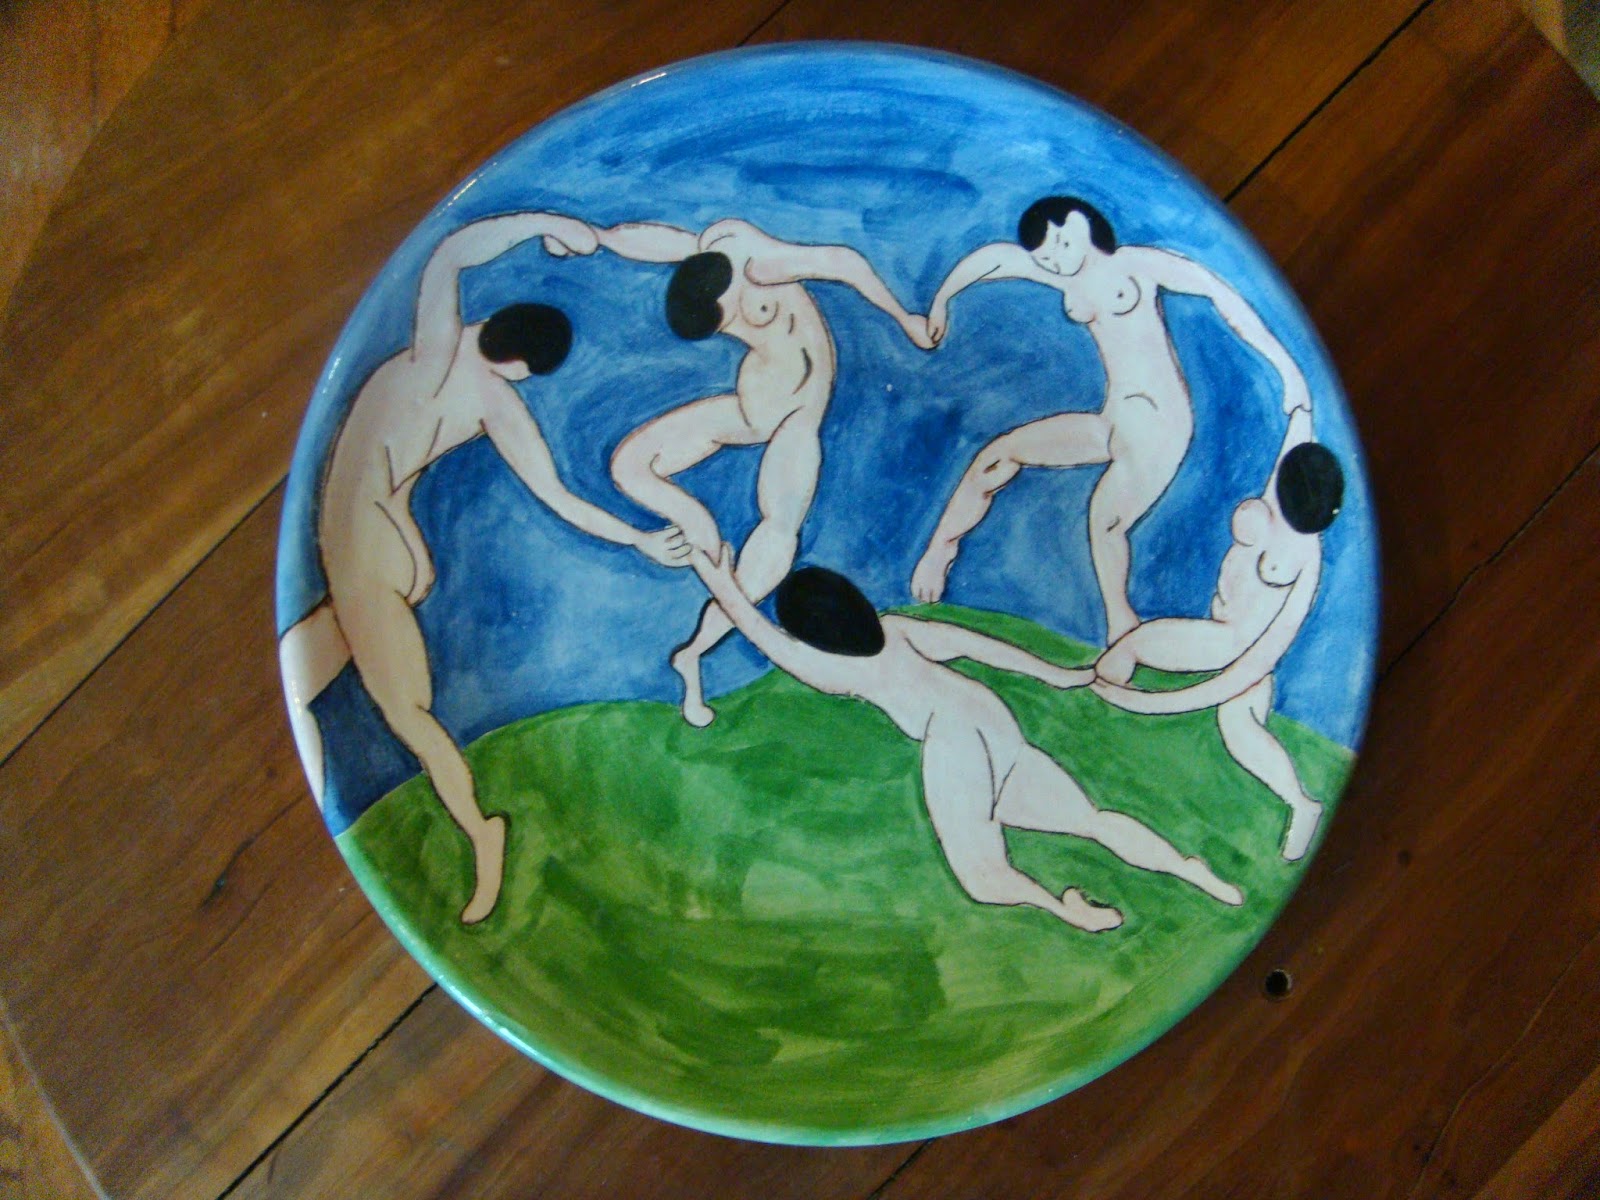
Matisse Plate

Matisse Plate. Commercial majolica glazes. Fired to cone 04.

M.C. Escher Plate

Finished product. Commercial majolica glazes and fired to cone 04.

Friday, April 04, 2014

Escher Plate

This plate is taking much longer than I had anticipated, and certainly been testing my patience. I'm still following my plans that I listed in my previous post.
I did paint the black fish first. That made it easier to fill in the white fish but it was a dizzying experience and sometimes very confusing. Don't know how Escher was able to do it.
I have just begun carving the details into the black fish. If you look at the black fish in the upper right of the plate you can see the white lines in the fin.
One deviation from my original plan was that after applying the base coat of white majolica, I fired the plate to approximately 1500 degrees to harden the glaze. I did this to make sure that when I was carving the details on the black fish I didn't carve through the white glaze. Seemed to work well.
Once I finish my carving I will paint the black lines on the perimeter of the plate to complete the tessellation. Should be fired this weekend along with my Matisse plate. Stay tuned for the final results.

Wednesday, March 26, 2014

Next plate--M.C. Escher

This M.C. Escher Fish Tessellation is my my next plate in my famous artwork plate series. I've been wondering how the hell I'm going to tackle this for the past few days and I think I have come up with a plan.
First step is already accomplished. I have applied 3 coats of white majolica glaze, as a base, to a bisque-fired plate.
I think the next step will be to draw just the outlines of each fish on the plate, with no inner details.
Step Three:  I'm going to paint all the black fish as silhouettes and then gently scratch through the black glaze to reveal white lines of the base glaze.
I think the next step will be the bitch for me, and my painting abilities, but  I'm going to attempt to paint the black-lined details on the white fish with a really fine brush. No doubt I'll probably have to have a few beers in me to give me patience and steadiness of hand. Haven't even thought about the exterior black lines yet but if I get that far, the lines should be a piece of cake.

Tuesday, March 25, 2014

Matisse Plate

Spent most the day yesterday painting this plate. This is my third plate to date. Plan on making a set of 12 total for an exhibit. It is going much slower than I thought it would. I'm blaming that on my paying job.
Only thing left to do on this plate is to paint black outlines and some body details on the figures.
The next plate is going to be a real challenge. It is an Escher and I'm still trying to figure out how I'm going to do it. I guess I'll just start painting.

Saturday, March 22, 2014

Beerador

My friends at the Stockyard recently purchased this beerador from a restaurant going out of business in Coon Valley, WI. I know it has nothing to do with pottery but I think it is a work of art. 
This beerador is circa 1939. Made by the Jewett Refrigeration Company in Buffalo, NY. The Old Style beer label was painted on the beerador probably by some local artist in La Crosse, WI, one time home of G. Heilman Brewery. The hand-painted images come from the original Old Style beer labels which reflect scenes of Heilman's hometown on the northwestern edge of the Swabian Jura, in Germany, a steep escarpment called the Albtrauf.
I've spent a lot of hours researching beeradoors and have only come across about a dozen photos of these units in working condition. Out of the dozen, four of them are in the La Crosse area. I'm sure there must be more out there but have only seen about a dozen with my own eyes.
If you have seen a beerador or know any more information about their history, please make a comment.

Do you recognize this signature?

My Aunt purchased a vase from a second-hand store in Minnesota and would like to find out  the potter's name. Any help would be appreciated.


Tuesday, March 11, 2014

Lichtenstein Plate

Spent Monday morning painting this Lichtenstein plate. I am really happy with the results. Amaco Majolica glazes and fired to cone 04.
I think my next plate will be either Franz Marc's "Blue Horse" or Edvard  Munch's "The Scream." Going to have to do some drawings and pick and choose.

Thursday, March 06, 2014

Picasso Plate

A famous and well know drawing by Picasso. I've actually seen this drawing many, many times over the years but I recently found this carved image on a piece of pottery made by Picasso himself.
While searching the internet for images of Picasso pottery I found this image carved into a rectangular yellow plate. Thought it would look good hanging on my wall so I gave it a try. It is not hanging on my wall yet but I really like it.
In the past I have called this clay body "white earthen ware" but it really isn't an earthenware body. It is made by Continental Clay and is called "Raku-Wet" and has a firing range from cone 06 to cone 10. I glazed this plate with Amaco Majolica glazes and fired it to cone 04.
I liked the results of this plate so much that I decided to try a series of plates with images of some of my favorite artists of the 20th Century.
I'm currently glazing a Lichtenstein painting on a plate using the Amaco majolica glazes. Stay tuned for the finished results.

Mother and Baby Sculpture

Finished product. White earthenware clay. Amaco Bluebell Opalescent glaze. Fired to cone 05.

Tuesday, February 25, 2014

Weekend Sculpture

A friend of mine found a sculpture like this one somewhere on the internet and asked me if I could make her one similar. Well, that's what I did this weekend.
I made the top part as a "pinch pot" and then added the head. The bottom part or the base I quickly threw on the wheel, slipped and scored, and attached to the upper half.
This sculpture is about 7-8 inches tall. Looking at this first attempt I think I want to make a larger one and refine the lines of the upper half.
Would like to throw the top half on the wheel and see if I can't carve and manipulate the form into a tear-drop shaped bowl.
We'll see. Next up, I'll be throwing some plates for a while and trying some new decorating techniques.

Sunday, October 06, 2013

Another Bird Feeder

Just another bird feeder. Wheel throw. Cone 10 stoneware. Reduction fired with Temoku glaze.

Tuesday, October 01, 2013

Bird Feeder

I finally finished the bird feeders I made and fired over a month ago.
The main cylinder was a rolled out slab that I wrapped around a cardboard tube. To hold the cylinder together I stamped three small balls of clay on the seam.
I threw the bottom saucer and the top lid on the wheel. The bottom saucer was slipped and scored to the cylinder. Quarter-inch nylon rope was run through the center of the feeder holding it all together and I used a metal rope thimble and wrapped the loose end with yellow thread. To fill the feeder you just slide the lid up and fill with seed.
Decorated with underglazes and Duncan Ultra clear glaze. Fired to cone 04.