Tuesday, December 18, 2012

Piggy Bank

A fun little project. I couldn't find a cork to stick in the pig's mouth but got lucky and found a wooden lid from a jar that fit perfectly.

Thursday, November 29, 2012

Horse Hair Pottery

During my mother and brothers visit last weekend I gave them a quick demonstration on horse hair pottery.
Start to finish was only about 40 minutes and both of them applied the horse hair to the pot and threw some granulated sugar on it.
Once at home I applied a thin layer of Johnson past wax to the pot and buffed it up with a cotton rag.
This pot had terra sig applied. My brother Scholl took the pot and celebrated the whole process and final result with a beer.

Wednesday, November 21, 2012

Cookie Jar

I didn't make this cookie jar. It was a slip-cast porcelain piece that was purchased years ago by my friend Lee. His wife would then glaze and fire the pieces. She passed away a couple years ago but Lee still had the jar and asked me if I would finish it for him
Well, I think it came out ok. I used store bought majolica glazes from Amaco and fired to cone 05.

Majolica Dishes

I fired my dishes on Monday and am pretty happy with the results. Amaco majolica glazes and a low-fire white clay body from Continental Clay.

Tuesday, November 13, 2012

Texture Stamps

Was hoping to fire up my raku kiln and do some horse hair pottery yesterday morning. Woke up to screaming winds and snow flurries.
While drinking my morning coffee and looking through pottery magazines I came across stamps. Figured that was a good way to spend a winters day.
I had made bunches of stamps while attending Viterbo college. Had a whole box of them but I left them there.
Fun to make and fun to use. I just rolled up small pieces of clay into ping pong-sized balls in the palms of my hands and used items I found around the house to create the textures. Once bisque-fired these will last ages.

Tuesday, October 30, 2012

I need dishes

When I moved into my new place I didn't have any dishes, not a one. Can't imagine that I've made hundreds of bowls, plates, mugs etc... over the past 20 years and I have no dinnerware.
This is a good start. The small salad plates are 9-inches in diameter. The bowls are 6-inch diameter and I threw 8 tumblers.
I used a white low-fire clay body from Continetal Clay and glazed them with commercial majolica glazes made by Amaco.
From left to right: Royal Blue and Violet, Royal blue and Orange, Royal Blue and Yellow, and finally Royal Blue and Rose.
I still plan on making some larger plates, some coffee mugs, and a couple of platters. I dont have a kitchen strainer for pastsa.....I might try making one of those too.

Tuesday, October 16, 2012

Piggy Bank

I saw a photo of a piggy bank similar to this one on one of my artist friend's facebook page. I thought, what a great idea. Simple and fun. I added eye lids and the floppy ears.
I'll use a commercial pink glaze and low-fire to cone 05 in the electric kiln. To finish it off I will plug the pig's mouth with a large cork.
I can see all kinds of possibilities with this project. All kinds of animal banks.
It didn't take anytime to make and was extremely fun.

Thursday, September 13, 2012

A Few More Pots

I'm really liking my new place. The front room is working out to be a really nice and comfortable studio.
Last night after dinner I had a little bit of time before bedtime so I quickly threw some bowls for the set of dishes I am making.
Should have enough pots to fill the bisque kiln this weekend. Looking forward to making some horsehair raku pottery soon. The terra sigilatta I made seems to work really well, so far. Can't wait to get it into the fire.

Thursday, September 06, 2012

Terra Sigilatta

Last night I decided to try my terra sigilatta and it looks fantastic. The photo does it no justice but these pots are smooth a a baby's bottom and have a fantastic shine.
I centered each pot on my potter's wheel and applied 3 thin coats of terra sig with a brush while the wheel was spinning at a slow speed.
Once the third coat was applied I waited for a few minutes and then buffed the pots with an old cotton t-shirt.
The brush application took about 5 minutes and then buffing, maybe another 5.
Next step the bisque kiln and then it is time to light up the raku kiln for some horsehair pottery.

Sunday, September 02, 2012

New home for my new wheel.

My new wheel has a new home. So do I. After many many years with Susan, I packed and split.
I didn't go far. I rented a nice small 2 bedroom, 1 and a half bathroom place just off Main Street in Coon Valley.
Actually a pretty cool place. It used to be an ice cream shop. Works out great for me as the whole front part of the old ice cream shop is now a nice sized studio with two big picture windows in the front and lots of counter top space and cupboards for storage.
The crappy plastic on the walls will be replaced with some dura-board and trimmed out sometime in the near future. I'm also right next door to a Pub. Cheers!

Thursday, July 26, 2012

Terra Sigillata

This is my first attempt at making terra sigillata. I want to make more pit-fired pots as well as do some horse-hair pieces and I have found out that I DO NOT like burnishing my pots with a spoon, marble or whatever. It is too time consuming and very boring.
Anyway I found this terra sig recipe on the internet, http://ceramicartsdaily.org/pottery-making-techniques/ceramic-decorating-techniques/terra-sigillata-101-how-to-make-apply-and-troubleshoot-terra-sig/.
I wrote it down on the 5-gallon jug and decided to try this one recipe in particular because I had the materials on hand. I wasn't sure about sodium silicate I used because it was several years old and took a lot of shaking and stirring to get it uniform again. I don't know. Can Sodium Silicate go bad? It also took 4 days for the terra sig to settle to the point where I siphoned 2 gallons from the 5-gallon container.
I haven't used it yet but hope to make some pots this weekend and give it a try.

Wednesday, June 06, 2012

Fat White Chawan

This glaze is an opaque matt white glaze but I think I'm going to have to rename it "Fat White." I love the thickness of the glaze and the orange peel effect is what I've been searching for for a long long time. The best thing about this glaze is that it is dependable with the same results every time.
I used wax resist in the carved recessed areas of the tea bowl and then applied a thick coat of the "Fat White" to the interior and exterior of the bowl.
To give the bowl an extra accent I carved through the glaze with a pin tool. The black is a result from the post reduction process.

Tuesday, June 05, 2012

My Favorite Chawan

I knew when I pulled this chawan from the raku kiln that this one was definately my Favorite to date.
First of all I have been searching for years for a "fat white" glaze that would crackle and also produce an "orange peel" effect.
Secondly, I've been searching longer for a dependable red. I got lucky this past weekend and produced some of my best tea bowls to date. I'll post some of the others on my website jeffguin.com

Friday, May 25, 2012

Ok! This post is for Joe since he wanted to see the fired results of this red iron oxide wash over my Matt White Opaque Raku glaze.
I was hoping this would turn out a light red rust color. Well, it turned out brown. It still has potential the way it was fired in this photo but I think I'll do another test but use a more diluted form of the wash. I applied this pretty thick and I think a thinner solution of the iron wash will produce a "nicer" result.

Tuesday, May 08, 2012

Glaze Testing Again

More glaze testing. This chawan has a base coat of a matt opaque white on the interior and exterior. I then mixed up a red iron oxide wash and applied that over the white glaze. Will raku fire this in my gas kiln and if I'm happy with the results will try it in my wood-fired raku kiln.

Wednesday, May 02, 2012

Raku Fired Chawan

Raku fired chawan glazed with a gloss opaque white glaze. I applied a red iron oxide wash over the bisqued bowl and then applied the glaze but my oxide wash must have been a little thin as it did not come through the withe opaque glaze like I had hoped. Will try the wash again, both under and over the glaze.

Kodai

Hand carved foot ring or kodai. I carved this foot ring with one of the tools I made out of a piece of flat banding steel.

Friday, April 27, 2012

Opaque Gloss White Raku Glaze

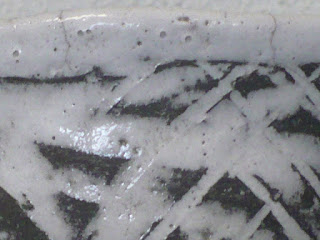
Here is a close up of the opaque gloss white glaze
pictured below. I like the glaze and will retest it with some brush strokes of red iron wash, under and over the glaze. Looks like it has lots of potential. I like the pinholing.
As is, the glaze doesn't appear to crawl so I am going to add some magnesium carbonate to the base and see what happens.

Tuesday, April 24, 2012

Raku Fired Tea Bowl

I finally was able to fire some tea bowls in the raku kiln this past weekend. Had several glazes to test and wasn't able to fire them all because I ran out of gas (not energy, propane). And, it was dangerously too windy to fire up the kiln yesterday.
Anyway, out of the pieces I did fire this is my favorite.
It is just a plain opaque gloss white glaze inside and out. The exterior was heavily textured and I used a metal rib to scrape off the glaze and even used a piece of sandpaper to clean it up a bit more.
The black, of course, was bare clay and recieved its color from post reduction in a can of sawdust.
I think this glaze has a lot of potential but it is a gloss white. I also have another similar bowl to fire that has been glazed in a matt white. Will post a photo of that when it is fired.
I also had a few failures, but all in all it was a pretty successful weekend.

Tuesday, April 10, 2012

Glaze Testing

Got a lot done in the studio yesterday. Started my bisque kiln bright and early with a load of torso sculptures that I made last year. While that was firing I decided to test some new raku glazes.
Thought I'd post them on my blog just in case I misplaced my notes.
Back left has a black underglaze and a gloss red on the exterior. The interior was glazed with Soldner's Clear Crackle Raku glaze.
Right Rear: Interior and exterior glazed with an opaque glosse white. This was a heavily textured tea bowl on the exterior so applied a heavy coat of the white and then used a metal rib to scrap away the top layer of glaze. In post reduction I am hoping the black will create a nice effect on the unglazed parts of the exterior.
Left front: Interior glazed with Soldner's Clear Crackle Raku. This was also textured on the exterior so I applied a gloss red and used the metal rib to scrape the high areas clean of glaze.
Center: This is a real "experimental" glaze. This is a borax and feldspar glaze with 15% magnesium carbonate added to create a crawling effect. The glaze brushed on terribly because of the Borax I think but I got a heavy coat on it. The interior is an opaque gloss white.
Right Front: opaque gloss white on the interior. Three brush coats on the exterior and then I brushed 3 coats of Amaco Arroyo Black glaze on top of that.
It was way to damn windy to fire up the raku kiln yesterday so I'll have to wait to fire these up. Maybe today. Stay tuned.

Wednesday, March 28, 2012

New Addition to the Studio

Newest addition to my studio, a Shimpo RK-Whisper potter's wheel. Actually it is the first store-bought wheel I've owned. I've made my other two wheels, my favorite sitting right next to the Shimpo.
It is a Korean or Onggi style kick wheel made out of about 50 board feet of cherry wood. For a touch of class I added one layer of walnut on the bottom half.
The first wheel I made is a kick wheel with a motor assist.
I also have a stand-up treadle wheel that was given to me. This wheel was made by artist Harvy Littleton sometime during the 1950s.

Thursday, March 08, 2012

New Coffee Mug

Just received this coffee mug in the mail yesterday. I traded some albany slip for it. It is made by Wisconsin potter Paul Boland. Paul is on Face book and he and his wife Amanda have an etsy page.
http://www.etsy.com/people/Haywainpottery

Sunday, January 01, 2012

Raku Red

This is about the only thing I have accomplished the past month. I've been working too many overtime hours at my paying job and haven't been able to fire anything, but this has a lot of potential.
It is actually a low-fire commercial red glaze that is dinnerware safe. I brushed two coats of the red on the tea bowl and then brushed a layer of commercial low-fire black over the red.
What I would like to experiment with is adding an opacifier and some magnesium carbonate to this red glaze. I'm hoping to tone-down the translucency a bit with zircopax and create some crawling with the magnesium carbonate. The end result, I hope, will look like a high-fire crawling shino. Will mix up some test glazes this week and will raku fire some more tea bowls onnext Saturday, weather permitting.