Saturday, June 30, 2007

Pots Are Loaded

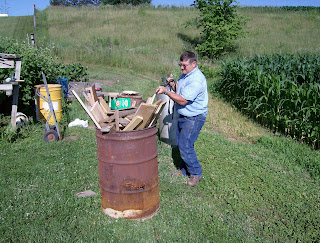
Loading the barrel.


First I dumped a medium-sized garbage bag of sawdust in the bottom of the barrel and placed my pots on top of that. The sawdust I got for free from a local lumberyard.

Next we sprinkled plant fertilizer around the pots. From what I've heard and read about, the plant fertilizer helps promote different flashes of color on the pots. Ok. I'll try it--$4.00 for a box of generic stuff at WalMart.

The next sprinkling was copper carbonate, purchased from a ceramics supply distributor. Thats about $7.00 bucks a pound and it is the greenish powder that is sprinkled next to and on top of the pottery. I was going to add some chicken bones and bannana peels, as one internet site suggested, but I was out of chicken bones and the peels were forgotten in the freezer at home. Oh well.

And finally, at the three o'clock position--a piece of copper pipe. This was Johns addition. I'm not sure what he thought it would or might do. In the end the pipe appeared to do nothing, as it was fully intact after the ashes were cleared.

Now on to the next step.

Layering of the Wood

We began placing wood in the barrel, first using
old dead grape vines. These were handy at the
burn pile and seemed to make a nice start.

After the really light stuff we went a bit heavier
with broken up pieces of slats and then pieces of
shipping pallets. In between we also sprinkled
some more fertilizer and copper carbonate.

Once the barrel was about half full I dumped a box of wood pieces from my friend Dave's garage. It was anything from plywood to other wood that he had built cabinets out of. And finally on top of that we addied the bigger hard wood, split hickory that John's brother Joe gave us.

Now that the barrel was fully loaded we were ready to light it up.

John Lights Up

Not a whole lot to say here. This is John lighting up the barrel, from the top,
using the torch from my raku kiln.

We figured the barrel would probably burn for about six hours and then take the rest of the night and early morning to cool down.

We had the burn rate about right. About 11pm the fire was going out. But, the pots were still hot the next morning when John pulled them from the ashes. In fact, he said he burned the middle finger out of one glove while removing the pots early Saturday morning.

No Turning Back


No Turning back now. By tomorrow morning we have a pile of shards, ugly pots, or....... a successful barrel firing.

Successful First Barrel Firing


And from the ashes came my first successful barrel firing.

Strange to say, but I haven't actually seen these pots yet. My guess is that my friend John was so excited to see the results that he couldn't sleep and he went out early this morning to check out the barrel. After which, this photo was emailed to me.

I don't know what John thinks, but I'm really happy with what I see. First of all I had never tried this type of firing before and I heard that breakage rates are high. I also didn't know what to expect--would 50% of my pots be broken? Would I get any colors at all on my pots, or would the surviving pots be an ugly black? I had no guidence on this other than a few posts I had read on the internet, and they talked about burning bannana peels and chicken bones. I mixed in some plant fertilizer and some copper carbonate. The colors look good to me. Maybe next time I'll try the peels and bones. Right now I've got to check out my new pots. Cheers!

Wednesday, June 13, 2007

Bisqued Pot

Since I am frequently asked, I thought I'd
explain to all my non-potter friends the various
steps or stages that go into producing a finished piece of pottery.
Pictured in this post is the same burnished pot I posted on Friday June 8th in its' leather hard stage.
Now the pot has been bisque fired. Bisque firing is kind of like a "pre-cooking" stage that basically takes out the molecular water so the pot doesn't explode in the final firing. Bisque firning also burns out the organic matter and makes the clay hard, yet porous enough to absorb glazes.
Since this pot will be barrel fired no glaze will be applied and it is now ready to be fired.
Most potters bisque fire, in an electric kiln, to temperatures between 1700 and 1800 degrees Fahrenheit and measure the temperature by using "cones" placed inside the kiln. I'll explain what the heck cones are and how they work in a future post. Next Post Up--Loading The Barrel Kiln.

Tuesday, June 12, 2007

On The Road To Barrel Firing


Yes! We're on the road to my first barrel firing. Last week John and I picked up a 55 gallon drum from the dump and this day John is drilling holes into the barrel to help air flow during the firing process. The holes were 1/4 inch in diameter and were drilled about 3 inches apart on each 3rd of the barrel. The drilling was easy and it took no time at all to punch through this old drum.
Ok, so what the heck is barrel firing--
Barrel firing is a modern day take-off of a primitive firing technique known as pit firing, which is the oldest known method of firing pottery. Basically, bisqued pots are nestled together in a layer of saw dust in the bottom of the 55 gallon drum and covered with dried organic materials such as wood and cow pies. What? Cow Pies? Well, Im not exactly sure about this but I believe cow pies were used because dried manure was a readily available source of fuel. Also I've read that the cow pies tend to burn real hot. I'll address the fuel more in-depth when we get to the firing part.
Anyway, Interspersed between the layers of wood and cow pies, copper carbonate, salt, plant fertilizer and even strange items such as bannana peels and chicken bones are added to produce flashes of colors during the firing process. These colors can range from pinks to reds, yellow and even brilliant blacks.
Firing in the barrel is the simple part, but breakage is high and getting the beautiful colors is the trick. Stay tuned. More to come.

Friday, June 08, 2007

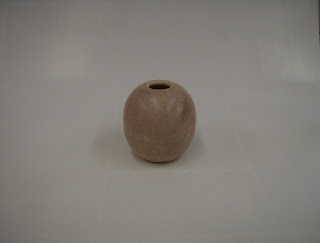
Burnished Pot

I'm getting ready to jump into a new firing technique--barrel firing, and burnishing this little pot is just part of the process.

I'll get into the details of Barrel firing in another post. Here I'll just talk about how I burnished this pot.

I threw this form on the wheel and smoothed the wet clay as smooth as possible with a metal rib. When the pot was almost bone dry ("leather hard" in potters terms) I used a metal spoon to burnish the pot. It took about an hour, gently rubbing the spoon in circular motions. At this point the pot took on a nice glossy sheen. It was probably ready to fire at this time but I decided to try burnishing it again with a little bit of Crisco oil. I had read about this method on the internet.

I applied a light coat of oil with my finger, about two-inches square at a time, and then polished the area in circular motions with the bottom side of the spoon. This was repeated until the whole pot took on a high gloss finish. Holding it in your hands, it looks and feels like a finely polished granite or marble stone.

Tuesday, June 05, 2007

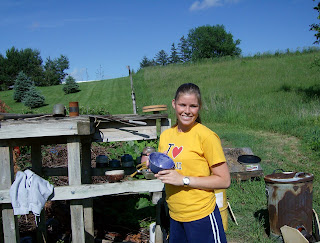
Julie's First Raku Bowl


What a crazy day. Weather looked good so we decided to glaze a few bowls at the college and head to the valley to fire up the kiln.
No sooner did we get the kiln loaded, it started to rain. Then it started to rain harder. Now, under an umbrella we heard a "poof!" "What was that?" She asked. Sorry dear. I just blew up one of your pots. What a sight: two despondent raku birds standing under an umbrella.
We were also going to try a horsehair pot, but Julie forgot her pot at the college. Even worse--I had a banded-up lock of horsehair hidden away under a tea bowl on the bench and it turned up missing, all but a couple strands. I think birds might have pilfered the hair for their nests. How I don't know.
The good news is the rain stopped and we reloaded the kiln to start again. The finished product: Julie's first raku bowl.
The blue glaze is a Soldner's Clear with 2 percent cobalt carb added. Julie's other two pieces were glazed with an opaque turquoise.
Next time we bring more pots and fire all afternoon.