 The Making of P-T-109
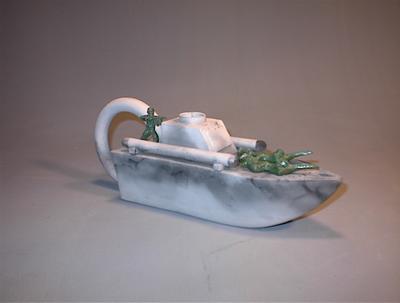
I am finally finished with P-Tea-109 and since so many of my friends are interested in how I made this teapot, here it is.
Before I start working with clay I actually build a scale model of the boat using thin cardboard. I cut out all the pieces, such as the sides and top, and then tape all the pieces together to form the model. These individual pieces will later become templates that I'll use to cut out my clay peices.
I use a low-fire, terra cotta, earthenware clay and start the building process by rolling out slabs of clay approximately 1/4 inch thick. Once these slabs have hardened a bit I use my cardboard templates and cut out the sides of the hull, the deck, the stern etc.... All these pieces are scored with a fork like tool, a liquid clay slip is applied, and the pieces are all "glued" together to form the shape of my boat (a
rough shape).
This rough shape is then refined using a variety of shaping tools such as trim tools and rubber ribs to smooth the surfaces. This is the "modeling" part of the process which continues until I am happy the teapot.
Once the teapot has thouroughly dried it is bisque fired and then decorated with underglazes. Underglazes are kind of like paint and applied like such. In this case I used just two colors, gray for the boat and red for the tips of the torpedo tube ends.
The handle was simply made using an extruder, forming the circular shape and attaching to the back of the boat.
The army men were made from plaster press molds that I made from plastic toy soldiers. These were also bisque-fired and "painted" with green underglaze.
The final firing of the boat involved using a saggar filled with pinecones and sawdust. A saggar is simply a box type form made out of firebrick. The teapot is placed in the saggar (which is inside the kiln), the pincones and sawdust are filled to the top of the sagger and a kiln shelf is placed on top to act as a lid. The kiln is then fired. The sawdust and pinecones burn up creating the random smoke patterns on the boat. The pine cones were used to create spatters of spots that resemble bullet holes or "battle wounds." Unfortunately these do not show up in this photo.
P-Tea-109 was saggar fired twice, as I was not happy with the appearance of the first firing. The results of the first firing can be seen as an earlier post to this blog.
Keep checking my blog site. More to come shortly, or at least as soon as I can get them done and posted.

