Tuesday, December 18, 2007

Tin Foil Saggar Firing Notes


I don't know what the heck happened with this photo, but I'm not taking another one. Basically I just wanted to record what I'm doing so that if all turns out I'll remember what the heck I did.

These are two pieces of bisqueware that I have prepared for tin foil saggars. I didn't Throw the forms. These are just a couple of pieces that were going to be thrown out at the end of the semester. These cups had not been burnished.

The claybody is just a regular cone 10 stoneware, and probably bisqued to about cone 08.

The cup on the left was sprayed with a 50/50 mix of Ferric Chloride and water using a regular spray bottle. I think it was an old Windex bottle. The green markings are actually brush marks of Copper Carbonate and water, approximately 8 ounces water and 1 Tablespoon of Copper Carb.

The cup on the right was sprayed with a Cobalt Carbonate and water mixture, approximately 1 Tablespoon Cobalt Carb. and 8 ounces water. The same brush marks of the Copper Carb. and water were applied.

The next step is to wrap these pieces up in heavy duty tin foil. What I've read is that you crumple up the tin foil, uncrumple it and then wrap up the bique ware. In this case I am not adding any organic materials, although I might add some when it comes time to wrap them up. I'll keep notes. Stay tuned.

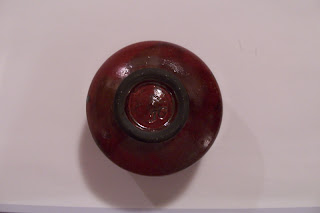
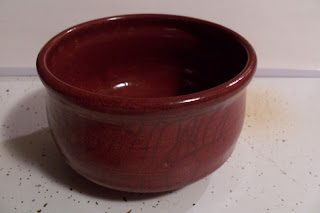
Many thanks to Aura Lee from Oregon. She has been reading my blog and also said she enjoyed reading it. Yeah! That's what I'm talking 'bout. Anyway she asked about my red raku glaze. I think the one she inquired about was a teabowl posted in Jan. 2007. I called it "Cabernet Red." No secrets here.

Cabernet Red Raku Glaze Recipe: as strange as it sounds it is approximately one handful of Burgundy Mason Stain to 3/4 of a plastic ice cream bucket of Soldners Clear Crackle Raku Glaze. I think I mixed a 2,000 gram batch of the clear, but it was about 3/4 full--80% Gerstley Borate, 20% Nepheline Syenite.

And once again, my raku firing has been delayed again. I usually get pretty fired-up when it comes to Raku-ing in the winter but lately it has been windy and cloudy. Oh! And cold too. I think the sun is supposed to come out today. Maybe today is the day.

Saturday, December 15, 2007

Building A Raku Kiln


Once again, studying my site meter, I noticed that there is a huge search demand for people interested in building a garbage can raku kiln. So, I thought I'd just let people know if they hadn't found it on my blog that they need to search my archives for January and Febuary 2006.

This is an older photo of me firing up my first kiln but everything will look the same today when I fire up my new raku kiln, except maybe the sun. At least I hope to fire it up. Right now its 10 degrees and overcast.

I'm anxious to try tin foil saggers so today I am going to run around town and pick up some supplies. I haven't been able to find any Ferric Chloride but I was told to try etching solution, which I can buy at Radio Shack. I'm also going to try to find some seaweed (seaweed in La Crosse?????). Anyway I have some shopping to do.

I also have two vases to fire that I had previously glazed with Soldner's Clear Crackle. Lots to do. Don't know how much gas I have in my 80-pound tank????

Friday, December 14, 2007

Rutile Blue Glaze


I've been scrutinizing my site meter information a lot lately and I noticed that somebody came across my sight by doing a google search for Rutile Blue Glaze. Well, if you're still searching maybe you'll find this recipe.

Rutile Blue Glaze

Cone 10 reduction

Dolomite 790, Custer Feldspar 1500, Whiting 555, EPK 840, Flint 1315, Add: Rutile 400, Add: Cobalt Carbonate 50.

This is the recipe used at Viterbo College in La Crosse, WI. In the future I'll try to include the glaze recipes in the photos I post.

Upcomming projects: Tin Foil Saggars, more raku, and more barrel firing.

Thursday, December 06, 2007

Pots by Jeff

Pots by Jeff. A group photo.

I don't have a favorite one. I like them all. I like the fact that each pot is "one of a kind," and that each pot tells its own unique story of how the fire created the markings and designs. Photos don't do these pots justice. These pots beg to be picked up. They really need to be touched and studied to understand the full story of their creation. Only then is their full beauty revealed. That's not a bunch of crap either. That's the way I feel and what I believe.

Tuesday, December 04, 2007

Barrel Fired Vase


This vase is approximately 14 inches tall and I didn't try any crazy experiments with this one. The only thing I did was fill the interior of the vase with sawdust and laid the pot on its side in the bed of sawdust.

Once I placed all all the pots in the bottom of the barrel I sprinkled an equal amount of MiracleGrow and Copper Carbonate around the pots. I then placed small pieces of scrap lumber around the pots and then started piling on the wood, smaller then heavier pieces till the barrel was full.

Once the fire was lit and the wood started to turn to coals and start dropping to the bottom of the barrel I began adding more pieces of split hickory to the barrel. I probably added about 10 pieces total, maybe one piece every 10-15 minutes. From that point on I just let the fire die down and out.

Twentyfour hours later there was only about 3 inches of ash on the bottom and the pots were still hot. I had to pull them out with leather gloves. I didn't know what to expect till I scrubbed the burnished pieces with some water and a green scrubby pad. Once I scrubbed them off I applied a small amount of Minwax Paste Finishing Wax and buffed each pot to a high glossy finish.

Saturday, December 01, 2007

Barrel Firing Notes


Another experiment from my last barrel firing. This is the vase that I wrapped steel wool around the bottom third of the pot.

Before placing the pot in the barrel I filled the interior with sawdust. My professor at Viterbo University, Gerrard Ferrari, commented that he preferred a black interior to compliment the colors on the outside of the pot. My previous pots were white and light gray on the interiors.

Once the vase was filled with sawdust I placed it in the barrel right side up in the sawdust at a slight angle. Most of the steel wool was surrounded in the bed of sawdust.

I thought the steel wool would produce some really interesting patterns on the pot and I also thought the patterns would produce blacks and grays--black where there was air between the pot and the wool and gray where the wool was pressed against the pot. Well, it didn't turn out that way.

The reddish line markings one third up the pot is where the steel wool ended. I'm thinking perhaps the steel wool created air pockets that produced the pinks and reds and just above that is the black produced by the top layer of the sawdust. I'm happy with the pot and will continue to experiment with the wool.

Thursday, November 29, 2007

Barrel Firing Notes


Remember the wire wrapped bottle? Well here it is after the firing.

You can see the vertical lines left by the 17 gauge wire. The wire was loosely wrapped around the bottle so I imagine that if tightly wrapped you will get more pronounced lines. The wire also did not melt during the firing and had to be unraveled off the bottle after it was pulled from the ashes.

I also wrapped a line of heavy gauge solder around the neck of the bottle and near the base. The solder did melt and there was no trace of it after the firing. I think the solder has some interesting potential.

On the back side of the bottle where the solder was wrapped around the neck there were small patches of metalic maroon and a couple shades of blue and purple. It was a small patch but it was only one strand of solder. In any case I think the solder might produce some real interesting and beautiful results.

I did a little bit of research and solder has a melting point of about 360F and most retail solders contain approximately 60% tin and 40% lead. Perhaps it is the tin that produced the metalic flashes.

This bottle was not burnished so it doesn't have the nice glossy marble look, but the flame patterns and the contrasting colors make it extremely interesting.

Wednesday, November 28, 2007

Barrel Firing Notes


Results are in from the Banana Peel Experiment.

This was the only pot that came out of the barrel firing that had red on it. I am attributing the red to the banana peels for two reasons: one being it was the only pot in the barrel to have red color markings, and two being the manner in which I draped the peels over the pot. On the inside of the pot the red markings go down about 1/3 of the way and then stop, probably because that is the way I draped the peels.

The black marking on the front is a result of how I placed the pot in the barrel. Before loading the pots into the barrel I dumped about 8 inches of sawdust into it to create a nice soft bed to place the pots. This pot was laid into the sawdust at about a 45 degree angle, the black area being the part that was in direct contact with the sawdust. This area got the least amount of oxygen during the firing and produced the jet black color you see.

A couple other things to note about this pot is the rough, dry matte surface, and the banana peel shadow on the bottom side of the pot. Since the pot was not burnished prior to the bisque firing, it produced the matte surface. I will post a photo of the banana shadow on my Flickr site. You can get there by "My Photo Gallery" link on the right hand side of this page.

Anyway, I'm really pleased with my 3rd barrel firing and especially the banana peel experiment. I'm still going to have to try it again, but all I can say is "Bring on the Chicken bones!"

Tuesday, November 27, 2007

Barrel Kiln Notes


Just some notes about the barrel kiln. This is actually a photo of me drilling holes into my first barrel kiln, but after yesterday's firing I felt the need to comment about drilling holes into the barrel.
This barrel burned really well, I believe, because holes 1/4 inch were drilled approximately every 6 inches in the middle section and the bottom section of the barrel. I also drilled several holes in the bottom of the barrel. So much wood is packed into the barrel during the firing that without the holes I think it would take forever for the fire to burn and quite possibly just burn out due to a lack of oxygen.
I say this because in my newest barrel kiln that I fired yesterday I wasn't able to drill enough holes because my drill batteries ran out of juice and as a result I had more smoke than fire. I won't know how well the newest barrel kiln fired until I can check it out after work today but I firmly believe, after my past two firings, that the more holes the better and what has worked well for me so far has been holes drilled appoximately every six inches around the exterior of the kiln.
Regardless, I'm drilling more holes.

Barrel Firing No. 3


Yipee! Yipee!

Finally. After weeks of rotten windy weather and set backs of some sort or another I was able to light up my 3rd barrel fire. Although, this one almost didn't happen as well.

I wanted to light it up on Friday afternoon, but too much wind. Wanted to light it up Saturday, but too much wind. Sunday was a great day so I jumped in the jeep for the short drive to the kiln and my truck died. Just died. Conked out going up the Coon Valley hill and I couldn't get it started. Had to get it towed back into town. Needless to say I was pissed off and bummed out. It really seemed like I was never going to get this barrel lit.

Don't know what happened to the truck but it started up the next day and although it was a little bit windy, I was going to light this barrel kiln.

I got a good load of hard hickory wood from my friend Tom but it was a bit green. Dang near ran out of matches before I got this thing going, but I got it going. I started it about 1pm and after feeding it for about an hour and a half let it burn down to coals.

Stay tuned for the results. Hope to have them posted tomorrow, Wednesday at the latest.

Barrel Firing Notes


More barrel firing notes.

I have no idea what effect the banana peels are going to have on this pot. Somewhere I read that chicken bones and bannana peels produce interesting colors so I laid banana peels over the rim of this pot and secured it in place with some 17 gauge wire.

We'll see what happens.

Tuesday, November 20, 2007

Barrel Firing Notes


Another Experiment for the next barrel firing. This time I wrapped a bottle form with 17 gauge electric fence wire. (Its what was available) I also had some thick solder so I wrapped a couple rings around the neck of the bottle and two rings on the lower part of the bottle.
Once again, the weather wasn't cooperative this weekend to fire up the kiln. It was too windy. I'm hoping for better weather today after work.

Saturday, November 17, 2007

Barrel Firing Notes

I'm searching for new colors and new effects on my barrel fired pots. This will be barrel firing number three. Here is my first experiment.

No, my pot hasn't grown a beard.

I used #3 steel wool that I cut open and stretched out to wrap around the lower third of this pot.

To help secure the wool in place I used some copper speaker wire that was stripped free from its insulation.

Barrel Firing Notes


I wrapped some masking tape over the steel wool to compress it to the pot. But after the fact, I realized that the tape is going to catch fire, burn up, and the steel wool is still going to be loosely wrapped around the pot.

I'm thinking about laying this pot down in the sawdust so that half of the form is buried in the sawdust and the other half exposed to the fire and coals.

Once again, we'll see what happens.

Tuesday, November 13, 2007

New Forms


I cranked out some new forms this past weekend. Basically bottle forms and vases for my barrel firing.

I managed to burnish four of the vases this weekend but was unable to bisque fire them. I was hoping to light-up the barrel kiln, but as usual it didn't happen as scheduled. Its going to happen next weekend, weather permitting.

These bottles and vases are about 12-13 inches tall, except for the shorty up front.

The two forms I like the most are the rounded bottle form with the flattened top and the bottle form just to the right of it.

Back to burnishing. I did briefly describe burnishing in a July 2007 Post but never really explained why I put the laborious time into getting a high satin gloss surface on the pots before firing them in my barrel. I suppose the main reason I burnish the pots is because I like the polished glossy surface when the pieces are pulled from the ashes. Burnishing is like polishing. It rearranges and compresses the clay surface particles and creates a smooth even texture that accepts the colored markings from the fire much more dramatically.

Burnishing my pots can take between one and three hours of rubbing and rubbing in very small circular motions with the back of a metal spoon. Another method to get this smooth glossy surface is by applying a layer of Terra Sigillata to the pot and then buffing to a high sheen using a soft cloth. Terra Sig is another new uncharted territory for me, but one that I'll get to.

Currently I am more interested in discovering what types of organic and inorganic materials create what colors during the firing. Not to mention, I am also looking for appealing pottery forms that compliment the entire process of "Barrel Firing."

Friday, October 26, 2007

Barrel Fired Vase


Another Saturday and not enough time in the day to get all the things done that I'd like to. Oh, I should mention that I posted the photo of the vase yesterday but didn't have time to write anything. Anyway.....

First thing is to make clay. I need some clay for throwing and I need a batch of heavily grogged clay for my barrel and raku firing.

Speaking of witch (it is Halloween, kinda), I need to start working on my new raku kiln. The burner system was finished last weekend and a photo posted last week. Today I need to line a garbage can with fiber. I also need to make some ceramic buttons to hold the fiber in place.

If that isn't enough for the day, I need to throw some more pots. And, before I forget.....
This is a vase from my last barrel firing. It's about 8-9 inches tall. I like it. Pretty much the whole vase is this marble peachy rosey marble color, except for the black spot in the front. That was where I laid the piece down in the sawdust.

I haven't heard anything about how well the Empty Bowls Project did in Viroqua. I only stopped for about an hour. Lots and Lots of bowls and a good crowd of people. As soon as I get word about the final results of the event I'll get them posted. Enough for now, time to get muddy.

Tuesday, October 23, 2007

Barrel Fired Tea Caddy


This barrel fired tea caddy is my favorite piece from my second firing.
Approximately five inches tall, 3 inches diameter.
To get the flame patterns on this piece I wrapped wire around the ouside of the pot. This also kept the lid secure. Then I placed the tea caddy on its side in a bed of sawdust on the bottom of the barrel kiln.
Miracle-Gro and copper carbonate was then sprinkled around the pot.
The barrel was then loaded with hickory, lit and burned to ashes. The pot was removed the next morning.
This piece will be on exhibit at Viterbo University in La Crosse, WI. for the next three months, Fine Arts Building, 3rd floor.
To see more barrel fired pots and photos of the firing go to my flickr site

Monday, October 22, 2007

Raku Burner System

New and improved Raku Burner System.

This was the base of one of those deep-fried oil turkey cookers. The legs were unscrewed from the top ring and the ring was lowered about four inches. I used vise-grips to clamp the legs back in place and then drilled new holes into the shorter legs. I used the original screws to secure the legs back onto the top ring. Next I bent down the legs to serve as supports for the kiln.

The burner came from my old kiln. The only difference is that a 90 degree brass elbow was screwed onto the burner to create an updraft burner.

The turkey burner was removed from the unit and 3 inches were cut out from the mounting cross member. The burner was then slid right into place.

Next step is to line another garbage can with some fiber.

The Death of Rusty Raku

Poor 'Ol Rusty is done.

Sometime in the past week some dirty little critters sqweeked through the plugged up burner port and chewed up the fiber.

This Fiber-Lined Garbage Can Raku Kiln was pushing two years old and has held up well, being exposed to all the Wisconsin elements.
I'm not sure how many firings I did in this kiln, but it was a heck of a lot.

Now its on to the next kiln design. Stay tuned.

Thursday, October 18, 2007

Empty Bowl Project Viroqua, WI


Saturday Oct. 20th from 4-9 pm the Viroqua Empty Bowls Project will be serving Soup and Bread to combat world hunger and poverty, and to teach about the connection art has in society.

Local area potters have made the bowls and donated them to the project. Participants in the event are asked to make a minimum donation of 20 dollars. When the meal is done, you get to keep the bowl. The diners can also choose where they would like their donations to go: local food pantries, international hunger relief, or the Empty Bowls Project.

Here are some of the bowls I am donating. The front left and right bowls are glazed with BSU Temmoku and the rims were dipped in Mamo White. The texture comes from porcelain slip which is brushed on the bowl when the bowl is still wet and on the potter's wheel.

The other bowls I used a combination of BSU Temmoku, Wax Resist, and Oxblood. The kiln was not heavily reduced but flashes of red mark each of these bowls.

Tuesday, October 16, 2007

Rutile Blue Tumblers


More tumblers, different glaze. This glaze is Viterbo's Rutile Blue. Once again those are my paw prints on the bottoms of the cups.

A Gift to Josh B., Meteorologist, WKBT La Crosse. Cheers!

Upcoming projects/events......I'm still waiting to light the barrel kiln. Weather forecast is good for next weekend. Will also fire-up the Raku kiln as well.

I've also just recently added the 500th HighFire Glaze to my Glaze Data Base. I bet by the time I'm done, I will have 1,000 glaze recipes

Also coming up is the Empty Bowls Project in Viroqua, Wisconsin. Saturday Oct. 20th, 4pm to 7pm. More info and photos coming about this one.

Thursday, October 11, 2007

More Tumblers


More Tumblers, or flat-bottomed cups without handles or feet.

I really like this glaze. The base glaze is BSU Temmoku. Once that is applied I drip hot wax over the cups (A technique called wax resist). Then I apply a coat of Oxblood glaze over the Temmoku. The Oxblood glaze runs off the wax revealing the base glaze.

The interior is glazed with Mamo White.

Anyway, I like this combination of glazes because it reminds me of tiger stripes. This combination of glazes can also produce two entirely different results. I have found that if I load the kiln with lots and lots of Oxblood glazed pieces, the Oxblood will produce brilliant deep reds when heavily reduced. But if I only have a few Oxblood glazed pieces in the kiln, I end up with the glaze you see here.

Thursday, September 27, 2007

Stoneware Tumblers


I haven't done much highfire stoneware in a while. These tumblers were thrown on the wheel, glazed with "Mammo White" on the inside and Temmoku on the outside. The little unglazed patches at the bottoms are my fingerprints.

When I glaze coffee mugs, tumblers, or other small forms, I pick up the piece (from the bottom) with my thumb and two fingers, and dunk it into the glaze bucket. The end result is that there is no glaze where I grasped the tumbler.

These were given to my friends Alex and Lyn Zee for helping me with my glaze data bases. Lynn Zee created PDF files for me and her husband Alex burned the data on to disks and printed nice photosof me on them as well.

Friday, September 21, 2007

Another Garden Sculpture


This bottle form was my first experience in "Working Big." It is about 42 inches tall, slab constructed, and made with terra cotta clay.
Using a slab roller I rolled out a bunch of clay about 3/4 of an inch thick and placed them on canvas covered drying boards. Next I measured out all the pieces I would need, such as front, back, sides, top and bottom, and then cut the slabs to size.
Once the clay had dried enough that I was able to handle the flat slabs I then assembled the form, scoring the edges, and used liquid clay slip as a glue to glue the pieces together.
more info coming.....

Monday, September 17, 2007

Garden Art


I made this dude about three years ago. I just realized I
didn't have a photo of it and thought I'd get it on my
blog.

This is actually only one of two "Big" pieces I've attempted. Right before this project I made a large slab-built bottle form.
I came up with the idea after browsing through the Sunday Paper Advertisements. I think it was just a little garden troll and I just made it BIG. First of all I wanted to work BIG, secondly I wanted to try my hand at sculpting, and finally I thought If I made it flat on top I could set our little weber grill on it.
The Garden Troll was made with terra cotta redart clay and was built-up using thick thick coils. Once the cylander shape was formed the coils were smoothed out using metal and wooden ribs. Small chunks of clay were then added to create the facial features and winding bark.
I glazed it with a low-fire glaze called "Lichen" and after the final firing it had shrunk just enough that the dang little weber wouldn't fit on it.
I probably should have taken the sculpture in each fall, as the winters have been pretty tough on the piece. But, I am kinda enjoying seeing the piece fade back into the earth.
As far as those little pieces of clay I talked about in my last post--I can't find them after bisque firing them. And, I'm working too much to be able to get my barrel kiln lit up. Maybe this weekend.

Friday, August 31, 2007

What the????


These little pieces of clay will eventually become necklaces. The two bead-like pendants will get a coat of some fancy-pants glaze and the little flat sun stamped piece I'll glaze with either an orange or a yellow.
I suppose the biggest news is the flood. Southwestern Wisconsin and Minnesota got hammered with it worst flooding in 100 years. In some cases, whole communities were underwater. It was absolutely terrible. Worst flooding in 100 years, national news coverage daily, and not one of my relatives called to find out how Susan and I were. I find that quite odd.
Anyway, I haven't had much time for pottery. In addition to the Flood I have been working overtime at work for the past seven weeks. But, the good news is that we're firing-up the barrel kiln again Tomorrow afternoon. Hope to have some nice pots on Sunday, photos will follow shortly afterwards.
Viterbo College started up last week. Can't wait to get back in the studio and crank out some new work. I have a bunch of drawings of some vase forms. I plan on slab-constructing them and then burninshing them when leather hard. I'll fire some in the barrel kiln and do some horsehair raku on the others. I also plan on making lots and lots of highfire utilitarian stoneware items.
Well, I suppose thats enough for now. Barrel firing photos soon.

Wednesday, August 01, 2007

What Have I been Doing?

I haven't been throwing any pots but I did finish burnishing my last set of pots. I even taught my friend John how to burnish. He did a great job. Now we just have to bisque fire them and then we're ready for another barrel firing.

I've also put all my raku glaze recipes into a data base which I'll be putting to a PDF file. I have 225 raku glaze recipes.

In addition to my raku glazes I've also been entering my cone 10 glaze recipes that I've collected over the past ten years. So far I've entered 120 glazes. I can't imagine how many I actually have. Wouldn't suprise me if I have over 1,000.

Upcoming Stoneware Projects: salad bowls for Mom, soup bowls for Brother, Yarn Bowl for Emily, Dog Dishes for Jennifer and Jerri, Mugs for LynZee and Alex, Bloody Mary Tumblers for Curtis, and lots and lots of Shino ware.

Tuesday, July 17, 2007

2nd Barrel Firing


I know. This is the same photo of the pots I posted last week, but I'm still working on them.

These are the babies that are going into the second Barrel-Firing, which seems to be set back farther on a daily basis due to weddings, weekend commitments, end yes--even work.

I did get these pots trimmed last Friday and thought I was going to burnish them all this weekend, but I was called into work on Sunday and only managed to get two of them burnished yesterday. Stay tuned--I'm still working on this post.

July 31st--Too much work makes Jeff a cranky person, but the good news is that the pots above have been burnished. It only took two weeks and even my friend John burnished one. His first attempt was a beautiful success. Now we just need to find time to fire-up the barrel.

Wednesday, July 11, 2007

Raku Glaze Recipes


Raku Glaze Recipes, raku glaze recipes, raku glaze recipes. Thats what I've been working on lately.

I am compiling a nice data base of all the raku glaze recipes I have collected over the years and will probably have over 300 glaze recipes when the database is completed.

If anybody is looking for a particular raku glaze recipe, maybe I have it. I'd be glad to share it. Or if anybody would like to send me their favorite glazes, I'd be glad to add them to the database.

Anyway, enough of glaze talk. Last weekend my buddy John took a picture of me and Rusty. I can't believe its been almost two years since I built this kiln. I wish I had kept a firing log to give me an idea of how many times I've fired it up and how much gas I've used. Believe it or not I'm still on the 80-pound tank of propane. I've had it about four months and I've been firing almost every weekend.

In the back ground are my newest kilns--barrel kilns. The crappy 'ol rusty one behind me is John's old burn barrel. Although we got a brand new nice yellow one a few weeks ago, I didn't want to ruin a good barrel in case my first barrel firing was a failure so I used John's burn barrel for the first firing.

Since the barrel firing was a great success we'll take John's old crappy barrel to the dump and drill holes in the nice new yellow one.

Countdown to the next barrel firing has begun. Stay tuned.

Tuesday, July 10, 2007


Right off the wheel.
I need some more pots to barrel fire. These are about 8 to 10 inches tall.
With these pots I start with about a 4-pound ball of clay and wedge the clay to make the clay consistent throughout and to remove any air pockets, or bubbles. Wedging is just like kneading dough for breads, pizza, pasta etc.
Once the clay is wedged I center the ball of clay on the wheel and proceed to throw, pull and create my pot.
The final step before I remove the pot from the wheel is to smooth the entire surface with a thin metal rib. Ribbing or smoothing the pot makes it much easier to burnish the "leather hard" clay. Burnishing is the most time consuming part of the process and is what will ultimately give the barrel fired pot its polished, marble-like, appearance when pulled from the ashes.
After all the pots are burnished they will be bique fired in an electric kiln and then they will be ready for the barrel firing. If all goes well, and weather permitting, I hope to load and light the barrel in two weeks.

Wednesday, July 04, 2007

Soldner's Clear Crackle Glaze


This is a great example of Paul Soldner's Clear Crackle Raku Glaze. It is also a pretty nice tea bowl too.

The crackles come from pulling the piece of pottery out of the hot raku kiln and placing it in another container full of burnable materials, in this case torn up news papers and sawdust.

Once the pottery is placed in this reduction chamber, the burnable materials ignite, a lid is placed on the reduction chamber and smoke fills the cracks in the glaze.

The recipe for Soldner's Clear Crackle is 80% Gerstley Borate and 20% Nepheline Syenite.

Tuesday, July 03, 2007

Same Pot


Yes this is the same pot I posted photos of earlier, once in the burnished leather hard stage and the other in the bisque fired stage.

Burnishing the pot in its leatherhard stage gave it a smooth shiny surface and it retained that surface after the firing, but to give it a higher gloss I polished the pot with a bit of paste wax.

One thing I learned after the firing was that the copper carbonate if applied directly to the pot during the "loading" stage will mar the smooth shiny surface. You can see the greenish powder sprinkled on the pots in an earlier post and if you look closely at the top rim of this pot you'll see the effects of the copper carbonate.

In this first firing I also only had two burnished pots. The rest were unburnished, and although they had the same beautiful flash marks from the fire, the surface was rough and had a mat finish.

Saturday, June 30, 2007

Pots Are Loaded

Loading the barrel.


First I dumped a medium-sized garbage bag of sawdust in the bottom of the barrel and placed my pots on top of that. The sawdust I got for free from a local lumberyard.

Next we sprinkled plant fertilizer around the pots. From what I've heard and read about, the plant fertilizer helps promote different flashes of color on the pots. Ok. I'll try it--$4.00 for a box of generic stuff at WalMart.

The next sprinkling was copper carbonate, purchased from a ceramics supply distributor. Thats about $7.00 bucks a pound and it is the greenish powder that is sprinkled next to and on top of the pottery. I was going to add some chicken bones and bannana peels, as one internet site suggested, but I was out of chicken bones and the peels were forgotten in the freezer at home. Oh well.

And finally, at the three o'clock position--a piece of copper pipe. This was Johns addition. I'm not sure what he thought it would or might do. In the end the pipe appeared to do nothing, as it was fully intact after the ashes were cleared.

Now on to the next step.

Layering of the Wood

We began placing wood in the barrel, first using
old dead grape vines. These were handy at the
burn pile and seemed to make a nice start.

After the really light stuff we went a bit heavier
with broken up pieces of slats and then pieces of
shipping pallets. In between we also sprinkled
some more fertilizer and copper carbonate.

Once the barrel was about half full I dumped a box of wood pieces from my friend Dave's garage. It was anything from plywood to other wood that he had built cabinets out of. And finally on top of that we addied the bigger hard wood, split hickory that John's brother Joe gave us.

Now that the barrel was fully loaded we were ready to light it up.

John Lights Up

Not a whole lot to say here. This is John lighting up the barrel, from the top,
using the torch from my raku kiln.

We figured the barrel would probably burn for about six hours and then take the rest of the night and early morning to cool down.

We had the burn rate about right. About 11pm the fire was going out. But, the pots were still hot the next morning when John pulled them from the ashes. In fact, he said he burned the middle finger out of one glove while removing the pots early Saturday morning.

No Turning Back


No Turning back now. By tomorrow morning we have a pile of shards, ugly pots, or....... a successful barrel firing.

Successful First Barrel Firing


And from the ashes came my first successful barrel firing.

Strange to say, but I haven't actually seen these pots yet. My guess is that my friend John was so excited to see the results that he couldn't sleep and he went out early this morning to check out the barrel. After which, this photo was emailed to me.

I don't know what John thinks, but I'm really happy with what I see. First of all I had never tried this type of firing before and I heard that breakage rates are high. I also didn't know what to expect--would 50% of my pots be broken? Would I get any colors at all on my pots, or would the surviving pots be an ugly black? I had no guidence on this other than a few posts I had read on the internet, and they talked about burning bannana peels and chicken bones. I mixed in some plant fertilizer and some copper carbonate. The colors look good to me. Maybe next time I'll try the peels and bones. Right now I've got to check out my new pots. Cheers!

Wednesday, June 13, 2007

Bisqued Pot

Since I am frequently asked, I thought I'd
explain to all my non-potter friends the various
steps or stages that go into producing a finished piece of pottery.
Pictured in this post is the same burnished pot I posted on Friday June 8th in its' leather hard stage.
Now the pot has been bisque fired. Bisque firing is kind of like a "pre-cooking" stage that basically takes out the molecular water so the pot doesn't explode in the final firing. Bisque firning also burns out the organic matter and makes the clay hard, yet porous enough to absorb glazes.
Since this pot will be barrel fired no glaze will be applied and it is now ready to be fired.
Most potters bisque fire, in an electric kiln, to temperatures between 1700 and 1800 degrees Fahrenheit and measure the temperature by using "cones" placed inside the kiln. I'll explain what the heck cones are and how they work in a future post. Next Post Up--Loading The Barrel Kiln.

Tuesday, June 12, 2007

On The Road To Barrel Firing


Yes! We're on the road to my first barrel firing. Last week John and I picked up a 55 gallon drum from the dump and this day John is drilling holes into the barrel to help air flow during the firing process. The holes were 1/4 inch in diameter and were drilled about 3 inches apart on each 3rd of the barrel. The drilling was easy and it took no time at all to punch through this old drum.
Ok, so what the heck is barrel firing--
Barrel firing is a modern day take-off of a primitive firing technique known as pit firing, which is the oldest known method of firing pottery. Basically, bisqued pots are nestled together in a layer of saw dust in the bottom of the 55 gallon drum and covered with dried organic materials such as wood and cow pies. What? Cow Pies? Well, Im not exactly sure about this but I believe cow pies were used because dried manure was a readily available source of fuel. Also I've read that the cow pies tend to burn real hot. I'll address the fuel more in-depth when we get to the firing part.
Anyway, Interspersed between the layers of wood and cow pies, copper carbonate, salt, plant fertilizer and even strange items such as bannana peels and chicken bones are added to produce flashes of colors during the firing process. These colors can range from pinks to reds, yellow and even brilliant blacks.
Firing in the barrel is the simple part, but breakage is high and getting the beautiful colors is the trick. Stay tuned. More to come.

Friday, June 08, 2007

Burnished Pot

I'm getting ready to jump into a new firing technique--barrel firing, and burnishing this little pot is just part of the process.

I'll get into the details of Barrel firing in another post. Here I'll just talk about how I burnished this pot.

I threw this form on the wheel and smoothed the wet clay as smooth as possible with a metal rib. When the pot was almost bone dry ("leather hard" in potters terms) I used a metal spoon to burnish the pot. It took about an hour, gently rubbing the spoon in circular motions. At this point the pot took on a nice glossy sheen. It was probably ready to fire at this time but I decided to try burnishing it again with a little bit of Crisco oil. I had read about this method on the internet.

I applied a light coat of oil with my finger, about two-inches square at a time, and then polished the area in circular motions with the bottom side of the spoon. This was repeated until the whole pot took on a high gloss finish. Holding it in your hands, it looks and feels like a finely polished granite or marble stone.

Tuesday, June 05, 2007

Julie's First Raku Bowl


What a crazy day. Weather looked good so we decided to glaze a few bowls at the college and head to the valley to fire up the kiln.
No sooner did we get the kiln loaded, it started to rain. Then it started to rain harder. Now, under an umbrella we heard a "poof!" "What was that?" She asked. Sorry dear. I just blew up one of your pots. What a sight: two despondent raku birds standing under an umbrella.
We were also going to try a horsehair pot, but Julie forgot her pot at the college. Even worse--I had a banded-up lock of horsehair hidden away under a tea bowl on the bench and it turned up missing, all but a couple strands. I think birds might have pilfered the hair for their nests. How I don't know.
The good news is the rain stopped and we reloaded the kiln to start again. The finished product: Julie's first raku bowl.
The blue glaze is a Soldner's Clear with 2 percent cobalt carb added. Julie's other two pieces were glazed with an opaque turquoise.
Next time we bring more pots and fire all afternoon.

Sunday, May 20, 2007

Food Pantry Update

Just an update on my pots for food project. Last week my friend Lisa gave me 20 bucks to buy some food. This load went to the 28th Street Church of Christ in La Crosse. I traded her one of my first raku wood-fired tea bowls. 20 dollars buys a lot at the WalMart.


I bought oodles of ramen noodles, parmesan cheese, several cans of tuna fish, a few cans of ragu sauce, a bunch of canned vegetables, and even some boxes of animal crackers for the little ones.

Pots for food is off to a slower start than I expected but I'm going to be throwing a bunch of pots this week, will be firing them next weekend, and will be hitting up my friends for donations. You're warned.

Friday, May 04, 2007

Help Stock the Food Pantries

I need some help. There are hungry people that could use some food.

I'm willing to trade a piece of my pottery for a donation to the food pantries in the La Crosse, Wisconsin area.

My friend "The Reverend" Mike put it best: "The pantry is getting low. We have some pasta, but people need some meat to go with it."

If I don't personally hit you up for a trade, contact me. We'll work a deal. If you don't want to give some food, give some dough. Lets get the pantries stocked!

Monday, April 23, 2007

Wax Resist Tea Bowl


I don't know why I haven't tried wax resist with my raku pieces earlier.
I was expecting a turquoise crackle glaze but ended up with a burgandy maroon. The glaze I used was "Ferguson's Turquoise." If you look close, you can see one speck of turquoise on the lower left of the bowl.
Anyway, to acheive this result I glazed the interior of the bowl and then painted hot wax on the interior. Then I dipped the rim in the hot wax to create a nice even glaze line around the rim of the bowl.
Holding the bowl upside down by the footring I dripped hot wax over the pot (to drip the wax I used a two-inch paint brush) . Once that was dry I dunked the bowl in the glaze bucket two times. The glaze ran off the pot where there were traces of wax. Once the footring was sponged off I fired-up the kiln.
It was a really windy day to be firing and I think the reason why I got red instead of turquoise was I had a hard time controlling the environment in my kiln. I had kiln shelves set up as wind breaks but even they kept blowing down. I was just too anxious to fire. In the end it worked out quite well and I am very happy with the end result.

Tuesday, April 03, 2007

Rusty Raku


Rusty Raku turned a year old just over a month ago. Unfortunately I didn't keep a kiln log so I'm not sure how many times I've fired 'Ol Rusty, but I'm guessing about 60 to 75 times.

A recent addition to my burner set-up is the 100-pound propane tank that my friend John gave me.

I still have the small 20-pounders but am using the "Big Mamma" on the "Big Bertha" unless I'm taking Rusty on a Road Trip.

I'm keeping a firing record on the tank, writing with a permanent marker the dates and times of firing. I'm wondering how many firings I can get out of Big Mamma?

I kept this kiln outside for the past year covering the top hole with a piece of kiln shelf and laying a brick against the burner port to keep the critters out. It has been rained on and snowed on pretty hard and has held-up just fine, except for the rust on the outside.

I still have all the materials to make another kiln so perhaps I should tackle that project this spring and give Rusty a little brother.

Sunday, February 25, 2007

No Raku Today

No Raku today, or tomorrow. Got hammered with snow this weekened. In fact, I think most of Wisconsin did. I wish I could have taken a picture of my kiln area but spent most the day shoveling and then didn't feel like making the drive. Probably wouldn't have been able to see it anyway. Maybe tomorrow.

Didn't throw anything, didn't fire anything. Dang! I've got a lot of catching up to do this week. I have a lot of high-fire stoneware pottery commisioned.

Would like to thank Richard in Terrell, Texas. He found my kiln building posts in my archives and created a real nice Adobe PDF document with all the text and photos. Hey Richard, sure wish I was in Texas this weekend. Thanks again. If anybody would like a copy, please let me know. I would be glad to pass it along. Well, I suppose I'd better sign off and get to some other things I'm behind on. More posts to follow. Cheers!


Wednesday, January 31, 2007

Red Raku Glaze

Finally, after a year of trying new glazes, firing them, experimenting with them, and modifiying them, I have found my Raku red. Call it lucky? A one-time red? No! Call it Cabernet Red, and its been tested and tested. The tea bowl ain't too bad either.


This was my first successful Cabernet Red tea bowl. There is very little smoke-filled crackling on the exterior of this tea bowl, but the inside has a nice faint crackle pattern throughout. I think this was the result of being over anxious and pulling it out of the reduction chamber too early. In any case, this bowl has become my favorite piece of pottery that I've made.
Last night I fired some more tea bowls just to make sure this wasn't a fluke . It was no fluke. This bowl has a beautiful smoke-filled crackle pattern inside and out.


To get a better smoke-filled crackle pattern I placed the tea bowls into the reduction chamber filled up with torn up newspaper, placed the cover on it and let it smoke for 5 minutes. Then I uncovered the container, and using tongs, pulled the pieces from the chamber and waved them around in the air, one at a time of course. You should have heard the crackle (it was pretty cold, about five degrees). After the "pinging" and crackling, I placed the bowl back into the reduction chamber, replaced the cover, and let it smoke another 5 minutes.
Now that I have my beautiful Cabernet Red I am going to experiment with some other decorating techniques using oxides, slips and wax resist.

Tuesday, January 30, 2007

Raku In 'Da Winter


This seems like Ground Hog's Day. The picture is one year old but, once again, last Sunday I was Raku-ing in the snow and cold. I was wearing the exact same snow gear, standing in the same amount of snow under a bright blue sky and wearing the same sun glasses.
The only difference being it was only zero degrees last Sunday, rather than sub zero temps, and my raku kiln is a bit more broken-in (rustier).
I've been testing and experimenting with new glazes since last year. I have compiled about a dozen that I really like but this Sunday I found my favorite. It is a beautiful burgundy/maroon. I'll have a photo to post in the next day or two. I want to use a different camera. Currently I am using an antique 1 Megapixel HP ('gonna have to invest in a better camera). Anyway, I should have the results of my firing posted soon. So, Please stay tuned.