Monday, September 17, 2007

Garden Art


I made this dude about three years ago. I just realized I
didn't have a photo of it and thought I'd get it on my
blog.

This is actually only one of two "Big" pieces I've attempted. Right before this project I made a large slab-built bottle form.
I came up with the idea after browsing through the Sunday Paper Advertisements. I think it was just a little garden troll and I just made it BIG. First of all I wanted to work BIG, secondly I wanted to try my hand at sculpting, and finally I thought If I made it flat on top I could set our little weber grill on it.
The Garden Troll was made with terra cotta redart clay and was built-up using thick thick coils. Once the cylander shape was formed the coils were smoothed out using metal and wooden ribs. Small chunks of clay were then added to create the facial features and winding bark.
I glazed it with a low-fire glaze called "Lichen" and after the final firing it had shrunk just enough that the dang little weber wouldn't fit on it.
I probably should have taken the sculpture in each fall, as the winters have been pretty tough on the piece. But, I am kinda enjoying seeing the piece fade back into the earth.
As far as those little pieces of clay I talked about in my last post--I can't find them after bisque firing them. And, I'm working too much to be able to get my barrel kiln lit up. Maybe this weekend.

Friday, August 31, 2007

What the????


These little pieces of clay will eventually become necklaces. The two bead-like pendants will get a coat of some fancy-pants glaze and the little flat sun stamped piece I'll glaze with either an orange or a yellow.
I suppose the biggest news is the flood. Southwestern Wisconsin and Minnesota got hammered with it worst flooding in 100 years. In some cases, whole communities were underwater. It was absolutely terrible. Worst flooding in 100 years, national news coverage daily, and not one of my relatives called to find out how Susan and I were. I find that quite odd.
Anyway, I haven't had much time for pottery. In addition to the Flood I have been working overtime at work for the past seven weeks. But, the good news is that we're firing-up the barrel kiln again Tomorrow afternoon. Hope to have some nice pots on Sunday, photos will follow shortly afterwards.
Viterbo College started up last week. Can't wait to get back in the studio and crank out some new work. I have a bunch of drawings of some vase forms. I plan on slab-constructing them and then burninshing them when leather hard. I'll fire some in the barrel kiln and do some horsehair raku on the others. I also plan on making lots and lots of highfire utilitarian stoneware items.
Well, I suppose thats enough for now. Barrel firing photos soon.

Wednesday, August 01, 2007

What Have I been Doing?

I haven't been throwing any pots but I did finish burnishing my last set of pots. I even taught my friend John how to burnish. He did a great job. Now we just have to bisque fire them and then we're ready for another barrel firing.

I've also put all my raku glaze recipes into a data base which I'll be putting to a PDF file. I have 225 raku glaze recipes.

In addition to my raku glazes I've also been entering my cone 10 glaze recipes that I've collected over the past ten years. So far I've entered 120 glazes. I can't imagine how many I actually have. Wouldn't suprise me if I have over 1,000.

Upcoming Stoneware Projects: salad bowls for Mom, soup bowls for Brother, Yarn Bowl for Emily, Dog Dishes for Jennifer and Jerri, Mugs for LynZee and Alex, Bloody Mary Tumblers for Curtis, and lots and lots of Shino ware.

Tuesday, July 17, 2007

2nd Barrel Firing


I know. This is the same photo of the pots I posted last week, but I'm still working on them.

These are the babies that are going into the second Barrel-Firing, which seems to be set back farther on a daily basis due to weddings, weekend commitments, end yes--even work.

I did get these pots trimmed last Friday and thought I was going to burnish them all this weekend, but I was called into work on Sunday and only managed to get two of them burnished yesterday. Stay tuned--I'm still working on this post.

July 31st--Too much work makes Jeff a cranky person, but the good news is that the pots above have been burnished. It only took two weeks and even my friend John burnished one. His first attempt was a beautiful success. Now we just need to find time to fire-up the barrel.

Wednesday, July 11, 2007

Raku Glaze Recipes


Raku Glaze Recipes, raku glaze recipes, raku glaze recipes. Thats what I've been working on lately.

I am compiling a nice data base of all the raku glaze recipes I have collected over the years and will probably have over 300 glaze recipes when the database is completed.

If anybody is looking for a particular raku glaze recipe, maybe I have it. I'd be glad to share it. Or if anybody would like to send me their favorite glazes, I'd be glad to add them to the database.

Anyway, enough of glaze talk. Last weekend my buddy John took a picture of me and Rusty. I can't believe its been almost two years since I built this kiln. I wish I had kept a firing log to give me an idea of how many times I've fired it up and how much gas I've used. Believe it or not I'm still on the 80-pound tank of propane. I've had it about four months and I've been firing almost every weekend.

In the back ground are my newest kilns--barrel kilns. The crappy 'ol rusty one behind me is John's old burn barrel. Although we got a brand new nice yellow one a few weeks ago, I didn't want to ruin a good barrel in case my first barrel firing was a failure so I used John's burn barrel for the first firing.

Since the barrel firing was a great success we'll take John's old crappy barrel to the dump and drill holes in the nice new yellow one.

Countdown to the next barrel firing has begun. Stay tuned.

Tuesday, July 10, 2007


Right off the wheel.
I need some more pots to barrel fire. These are about 8 to 10 inches tall.
With these pots I start with about a 4-pound ball of clay and wedge the clay to make the clay consistent throughout and to remove any air pockets, or bubbles. Wedging is just like kneading dough for breads, pizza, pasta etc.
Once the clay is wedged I center the ball of clay on the wheel and proceed to throw, pull and create my pot.
The final step before I remove the pot from the wheel is to smooth the entire surface with a thin metal rib. Ribbing or smoothing the pot makes it much easier to burnish the "leather hard" clay. Burnishing is the most time consuming part of the process and is what will ultimately give the barrel fired pot its polished, marble-like, appearance when pulled from the ashes.
After all the pots are burnished they will be bique fired in an electric kiln and then they will be ready for the barrel firing. If all goes well, and weather permitting, I hope to load and light the barrel in two weeks.

Wednesday, July 04, 2007

Soldner's Clear Crackle Glaze


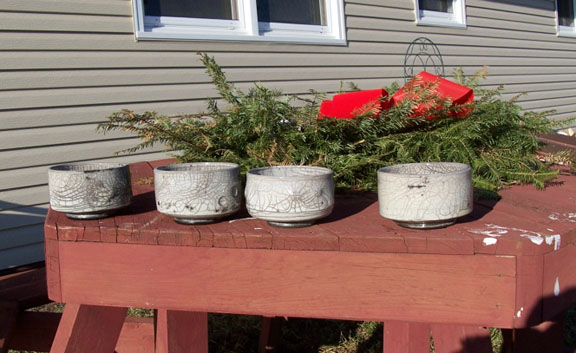
This is a great example of Paul Soldner's Clear Crackle Raku Glaze. It is also a pretty nice tea bowl too.

The crackles come from pulling the piece of pottery out of the hot raku kiln and placing it in another container full of burnable materials, in this case torn up news papers and sawdust.

Once the pottery is placed in this reduction chamber, the burnable materials ignite, a lid is placed on the reduction chamber and smoke fills the cracks in the glaze.

The recipe for Soldner's Clear Crackle is 80% Gerstley Borate and 20% Nepheline Syenite.

Tuesday, July 03, 2007

Same Pot


Yes this is the same pot I posted photos of earlier, once in the burnished leather hard stage and the other in the bisque fired stage.

Burnishing the pot in its leatherhard stage gave it a smooth shiny surface and it retained that surface after the firing, but to give it a higher gloss I polished the pot with a bit of paste wax.

One thing I learned after the firing was that the copper carbonate if applied directly to the pot during the "loading" stage will mar the smooth shiny surface. You can see the greenish powder sprinkled on the pots in an earlier post and if you look closely at the top rim of this pot you'll see the effects of the copper carbonate.

In this first firing I also only had two burnished pots. The rest were unburnished, and although they had the same beautiful flash marks from the fire, the surface was rough and had a mat finish.

Saturday, June 30, 2007

Pots Are Loaded

Loading the barrel.


First I dumped a medium-sized garbage bag of sawdust in the bottom of the barrel and placed my pots on top of that. The sawdust I got for free from a local lumberyard.

Next we sprinkled plant fertilizer around the pots. From what I've heard and read about, the plant fertilizer helps promote different flashes of color on the pots. Ok. I'll try it--$4.00 for a box of generic stuff at WalMart.

The next sprinkling was copper carbonate, purchased from a ceramics supply distributor. Thats about $7.00 bucks a pound and it is the greenish powder that is sprinkled next to and on top of the pottery. I was going to add some chicken bones and bannana peels, as one internet site suggested, but I was out of chicken bones and the peels were forgotten in the freezer at home. Oh well.

And finally, at the three o'clock position--a piece of copper pipe. This was Johns addition. I'm not sure what he thought it would or might do. In the end the pipe appeared to do nothing, as it was fully intact after the ashes were cleared.

Now on to the next step.

Layering of the Wood

We began placing wood in the barrel, first using
old dead grape vines. These were handy at the
burn pile and seemed to make a nice start.

After the really light stuff we went a bit heavier
with broken up pieces of slats and then pieces of
shipping pallets. In between we also sprinkled
some more fertilizer and copper carbonate.

Once the barrel was about half full I dumped a box of wood pieces from my friend Dave's garage. It was anything from plywood to other wood that he had built cabinets out of. And finally on top of that we addied the bigger hard wood, split hickory that John's brother Joe gave us.

Now that the barrel was fully loaded we were ready to light it up.

John Lights Up

Not a whole lot to say here. This is John lighting up the barrel, from the top,
using the torch from my raku kiln.

We figured the barrel would probably burn for about six hours and then take the rest of the night and early morning to cool down.

We had the burn rate about right. About 11pm the fire was going out. But, the pots were still hot the next morning when John pulled them from the ashes. In fact, he said he burned the middle finger out of one glove while removing the pots early Saturday morning.

No Turning Back


No Turning back now. By tomorrow morning we have a pile of shards, ugly pots, or....... a successful barrel firing.

Successful First Barrel Firing


And from the ashes came my first successful barrel firing.

Strange to say, but I haven't actually seen these pots yet. My guess is that my friend John was so excited to see the results that he couldn't sleep and he went out early this morning to check out the barrel. After which, this photo was emailed to me.

I don't know what John thinks, but I'm really happy with what I see. First of all I had never tried this type of firing before and I heard that breakage rates are high. I also didn't know what to expect--would 50% of my pots be broken? Would I get any colors at all on my pots, or would the surviving pots be an ugly black? I had no guidence on this other than a few posts I had read on the internet, and they talked about burning bannana peels and chicken bones. I mixed in some plant fertilizer and some copper carbonate. The colors look good to me. Maybe next time I'll try the peels and bones. Right now I've got to check out my new pots. Cheers!

Wednesday, June 13, 2007

Bisqued Pot

Since I am frequently asked, I thought I'd
explain to all my non-potter friends the various
steps or stages that go into producing a finished piece of pottery.
Pictured in this post is the same burnished pot I posted on Friday June 8th in its' leather hard stage.
Now the pot has been bisque fired. Bisque firing is kind of like a "pre-cooking" stage that basically takes out the molecular water so the pot doesn't explode in the final firing. Bisque firning also burns out the organic matter and makes the clay hard, yet porous enough to absorb glazes.
Since this pot will be barrel fired no glaze will be applied and it is now ready to be fired.
Most potters bisque fire, in an electric kiln, to temperatures between 1700 and 1800 degrees Fahrenheit and measure the temperature by using "cones" placed inside the kiln. I'll explain what the heck cones are and how they work in a future post. Next Post Up--Loading The Barrel Kiln.

Tuesday, June 12, 2007

On The Road To Barrel Firing


Yes! We're on the road to my first barrel firing. Last week John and I picked up a 55 gallon drum from the dump and this day John is drilling holes into the barrel to help air flow during the firing process. The holes were 1/4 inch in diameter and were drilled about 3 inches apart on each 3rd of the barrel. The drilling was easy and it took no time at all to punch through this old drum.
Ok, so what the heck is barrel firing--
Barrel firing is a modern day take-off of a primitive firing technique known as pit firing, which is the oldest known method of firing pottery. Basically, bisqued pots are nestled together in a layer of saw dust in the bottom of the 55 gallon drum and covered with dried organic materials such as wood and cow pies. What? Cow Pies? Well, Im not exactly sure about this but I believe cow pies were used because dried manure was a readily available source of fuel. Also I've read that the cow pies tend to burn real hot. I'll address the fuel more in-depth when we get to the firing part.
Anyway, Interspersed between the layers of wood and cow pies, copper carbonate, salt, plant fertilizer and even strange items such as bannana peels and chicken bones are added to produce flashes of colors during the firing process. These colors can range from pinks to reds, yellow and even brilliant blacks.
Firing in the barrel is the simple part, but breakage is high and getting the beautiful colors is the trick. Stay tuned. More to come.

Friday, June 08, 2007

Burnished Pot

I'm getting ready to jump into a new firing technique--barrel firing, and burnishing this little pot is just part of the process.

I'll get into the details of Barrel firing in another post. Here I'll just talk about how I burnished this pot.

I threw this form on the wheel and smoothed the wet clay as smooth as possible with a metal rib. When the pot was almost bone dry ("leather hard" in potters terms) I used a metal spoon to burnish the pot. It took about an hour, gently rubbing the spoon in circular motions. At this point the pot took on a nice glossy sheen. It was probably ready to fire at this time but I decided to try burnishing it again with a little bit of Crisco oil. I had read about this method on the internet.

I applied a light coat of oil with my finger, about two-inches square at a time, and then polished the area in circular motions with the bottom side of the spoon. This was repeated until the whole pot took on a high gloss finish. Holding it in your hands, it looks and feels like a finely polished granite or marble stone.

Tuesday, June 05, 2007

Julie's First Raku Bowl


What a crazy day. Weather looked good so we decided to glaze a few bowls at the college and head to the valley to fire up the kiln.
No sooner did we get the kiln loaded, it started to rain. Then it started to rain harder. Now, under an umbrella we heard a "poof!" "What was that?" She asked. Sorry dear. I just blew up one of your pots. What a sight: two despondent raku birds standing under an umbrella.
We were also going to try a horsehair pot, but Julie forgot her pot at the college. Even worse--I had a banded-up lock of horsehair hidden away under a tea bowl on the bench and it turned up missing, all but a couple strands. I think birds might have pilfered the hair for their nests. How I don't know.
The good news is the rain stopped and we reloaded the kiln to start again. The finished product: Julie's first raku bowl.
The blue glaze is a Soldner's Clear with 2 percent cobalt carb added. Julie's other two pieces were glazed with an opaque turquoise.
Next time we bring more pots and fire all afternoon.

Sunday, May 20, 2007

Food Pantry Update

Just an update on my pots for food project. Last week my friend Lisa gave me 20 bucks to buy some food. This load went to the 28th Street Church of Christ in La Crosse. I traded her one of my first raku wood-fired tea bowls. 20 dollars buys a lot at the WalMart.


I bought oodles of ramen noodles, parmesan cheese, several cans of tuna fish, a few cans of ragu sauce, a bunch of canned vegetables, and even some boxes of animal crackers for the little ones.

Pots for food is off to a slower start than I expected but I'm going to be throwing a bunch of pots this week, will be firing them next weekend, and will be hitting up my friends for donations. You're warned.

Friday, May 04, 2007

Help Stock the Food Pantries

I need some help. There are hungry people that could use some food.

I'm willing to trade a piece of my pottery for a donation to the food pantries in the La Crosse, Wisconsin area.

My friend "The Reverend" Mike put it best: "The pantry is getting low. We have some pasta, but people need some meat to go with it."

If I don't personally hit you up for a trade, contact me. We'll work a deal. If you don't want to give some food, give some dough. Lets get the pantries stocked!

Monday, April 23, 2007

Wax Resist Tea Bowl


I don't know why I haven't tried wax resist with my raku pieces earlier.
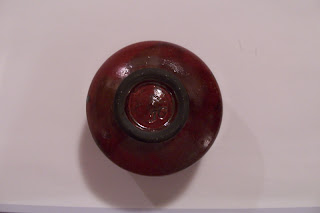
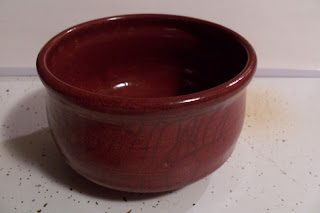
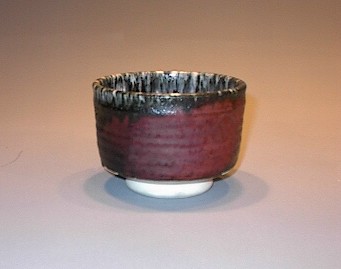
I was expecting a turquoise crackle glaze but ended up with a burgandy maroon. The glaze I used was "Ferguson's Turquoise." If you look close, you can see one speck of turquoise on the lower left of the bowl.
Anyway, to acheive this result I glazed the interior of the bowl and then painted hot wax on the interior. Then I dipped the rim in the hot wax to create a nice even glaze line around the rim of the bowl.
Holding the bowl upside down by the footring I dripped hot wax over the pot (to drip the wax I used a two-inch paint brush) . Once that was dry I dunked the bowl in the glaze bucket two times. The glaze ran off the pot where there were traces of wax. Once the footring was sponged off I fired-up the kiln.
It was a really windy day to be firing and I think the reason why I got red instead of turquoise was I had a hard time controlling the environment in my kiln. I had kiln shelves set up as wind breaks but even they kept blowing down. I was just too anxious to fire. In the end it worked out quite well and I am very happy with the end result.

Tuesday, April 03, 2007

Rusty Raku


Rusty Raku turned a year old just over a month ago. Unfortunately I didn't keep a kiln log so I'm not sure how many times I've fired 'Ol Rusty, but I'm guessing about 60 to 75 times.

A recent addition to my burner set-up is the 100-pound propane tank that my friend John gave me.

I still have the small 20-pounders but am using the "Big Mamma" on the "Big Bertha" unless I'm taking Rusty on a Road Trip.

I'm keeping a firing record on the tank, writing with a permanent marker the dates and times of firing. I'm wondering how many firings I can get out of Big Mamma?

I kept this kiln outside for the past year covering the top hole with a piece of kiln shelf and laying a brick against the burner port to keep the critters out. It has been rained on and snowed on pretty hard and has held-up just fine, except for the rust on the outside.

I still have all the materials to make another kiln so perhaps I should tackle that project this spring and give Rusty a little brother.

Sunday, February 25, 2007

No Raku Today

No Raku today, or tomorrow. Got hammered with snow this weekened. In fact, I think most of Wisconsin did. I wish I could have taken a picture of my kiln area but spent most the day shoveling and then didn't feel like making the drive. Probably wouldn't have been able to see it anyway. Maybe tomorrow.

Didn't throw anything, didn't fire anything. Dang! I've got a lot of catching up to do this week. I have a lot of high-fire stoneware pottery commisioned.

Would like to thank Richard in Terrell, Texas. He found my kiln building posts in my archives and created a real nice Adobe PDF document with all the text and photos. Hey Richard, sure wish I was in Texas this weekend. Thanks again. If anybody would like a copy, please let me know. I would be glad to pass it along. Well, I suppose I'd better sign off and get to some other things I'm behind on. More posts to follow. Cheers!


Wednesday, January 31, 2007

Red Raku Glaze

Finally, after a year of trying new glazes, firing them, experimenting with them, and modifiying them, I have found my Raku red. Call it lucky? A one-time red? No! Call it Cabernet Red, and its been tested and tested. The tea bowl ain't too bad either.


This was my first successful Cabernet Red tea bowl. There is very little smoke-filled crackling on the exterior of this tea bowl, but the inside has a nice faint crackle pattern throughout. I think this was the result of being over anxious and pulling it out of the reduction chamber too early. In any case, this bowl has become my favorite piece of pottery that I've made.
Last night I fired some more tea bowls just to make sure this wasn't a fluke . It was no fluke. This bowl has a beautiful smoke-filled crackle pattern inside and out.


To get a better smoke-filled crackle pattern I placed the tea bowls into the reduction chamber filled up with torn up newspaper, placed the cover on it and let it smoke for 5 minutes. Then I uncovered the container, and using tongs, pulled the pieces from the chamber and waved them around in the air, one at a time of course. You should have heard the crackle (it was pretty cold, about five degrees). After the "pinging" and crackling, I placed the bowl back into the reduction chamber, replaced the cover, and let it smoke another 5 minutes.
Now that I have my beautiful Cabernet Red I am going to experiment with some other decorating techniques using oxides, slips and wax resist.

Tuesday, January 30, 2007

Raku In 'Da Winter


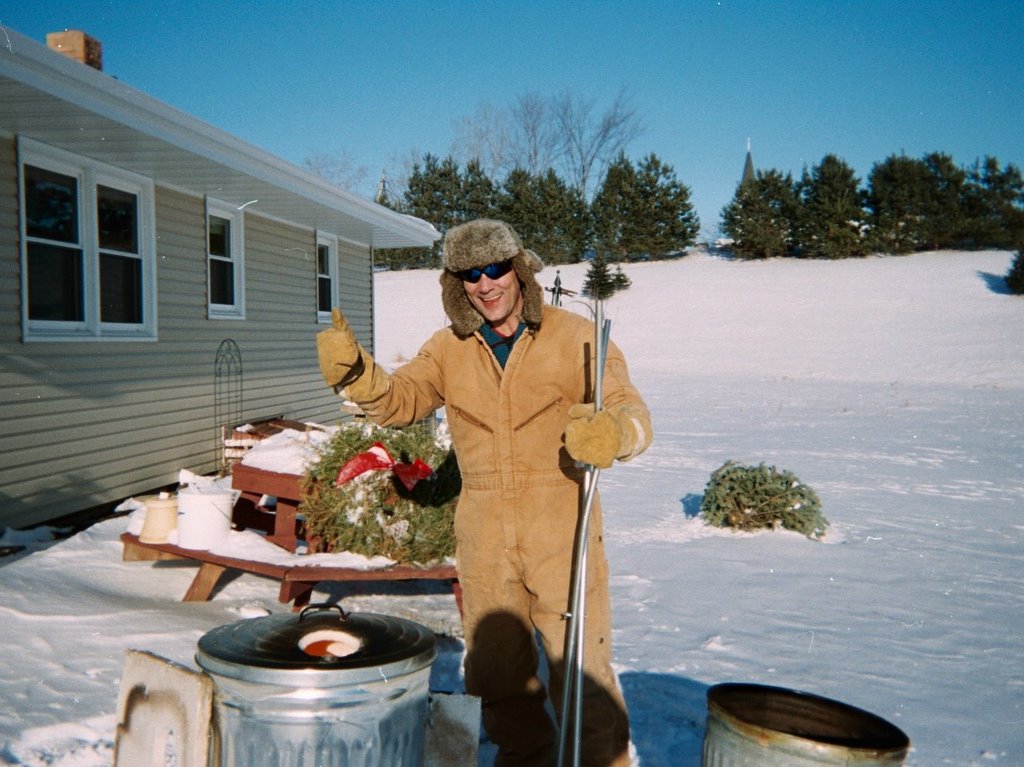
This seems like Ground Hog's Day. The picture is one year old but, once again, last Sunday I was Raku-ing in the snow and cold. I was wearing the exact same snow gear, standing in the same amount of snow under a bright blue sky and wearing the same sun glasses.
The only difference being it was only zero degrees last Sunday, rather than sub zero temps, and my raku kiln is a bit more broken-in (rustier).
I've been testing and experimenting with new glazes since last year. I have compiled about a dozen that I really like but this Sunday I found my favorite. It is a beautiful burgundy/maroon. I'll have a photo to post in the next day or two. I want to use a different camera. Currently I am using an antique 1 Megapixel HP ('gonna have to invest in a better camera). Anyway, I should have the results of my firing posted soon. So, Please stay tuned.

Tuesday, October 03, 2006

Horsehair Pottery Update

More on the orgins/history of Horsehair Pottery--

A recent comment was just posted on my Flickr Photo Site. ClayHorse, another Flicker potter, has just informed me that she recently learned that Horsehair Pottery was invented by Native Americans of the Southwest as a means to honor their fallen war horses.
Thanks ClayHorse.

Monday, October 02, 2006

Rajah's Horsehair

Another successful raku firing in the Valley. Details to Follow. Stay tuned.

So whats up with horsehair? I'm not sure if this is a true story, myth or what, about the origins of Horsehair Pottery. But, this is what I've been told.

Once upon a time in New Mexico, or there abouts, a beautiful Native American potter was uncovering her earth kiln to see all the wonderful new pots she had created. The pots were still hot, I mean they were HOT, and while she was bending over removing one of the pots her pony tail accidently brushed over the pot. It sizzled and shriveled and burned just enough to leave behind wonderful carbon traces on the pot. And thus, Horsehair pottery was born.

Myth? Fact? I don't know, but it makes one dang good story.

Oh, one last thing--No horses were harmed or mistreated in anyway, shape, or form, in the process of creating this beautiful teabowl.

Wednesday, September 27, 2006

Horsehair Teabowl


This Teabowl was made from a heavily grogged white stoneware clay body and bisque fired to approximately 1600 degrees.
Once bisqued the bowl was placed on a banding wheel and a coating of liquid wax was applied to the exterior. This was done so a neat glaze line at the rim could be easily achieved. The interior and rim were then glazed with Ferguson's Turquoise Raku Glaze.
The teabowl was then fired in a fiber-lined raku kiln until glowing hot and the glaze was liquid-glassy, approximately 1900 degrees.
At this time the teabowl was removed from the kiln and individual strands of horsehair were applied to the exterior of the surface. The hair imediately begins to burn and shrivels up resulting in a small deposit of smoke and carbon, leaving a permanent trace of the horsehair.
The ashes are washed off once the piece is cool and when the bowl is completely dry the exterior is polished with paste wax and buffed to a soft satin luster finish.

Saturday, September 09, 2006

Hand Carved Chawan


Chawan? Whats a Chawan? Well, by simple definition, for many western potters, it is Japanese for teabowl. But, I think Chawan has a much deeper meaning.

I know very little of the Japanese Tea Ceremony but Chawan were treasured by the ancient Tea Masters. Even today the Chawan is a special and treasured breed of ware. Pictured in this post is what I call my first hand carved Chawan. It was Raku fired in my crude, brick , raku wood kiln.

Aoyama Wahei wrote in Japanese Ceramics Now that "a Chawan has certain rules that must be kept in order for the bowl to be classified as a chawan. For example, many advocates of tea, along with potters themselves, claim that the chawan must have a balance between several elements, such as height, width, depth, lip, body, and foot-ring. A lack of these elements will make the bowl either a plate or a mutli-purpose bowl, but not a tool that is appropriate for drinking frothy green tea in the tea ceremony."

Furthermore a good chawan should reveal a strength and spontaneity of the potter who created the bowl and should be interesting when viewed from all angles. Even the foot-ring will reveal the skill and state of mind of the potter who carved the bowl.

I don't have enough knowledge yet, or the space, to continue my rant about what a chawan is, or go into the significance of the chawan and the Japanese Tea Ceremony, but I can safely say that a chawan isn't your grandma's tea cup.

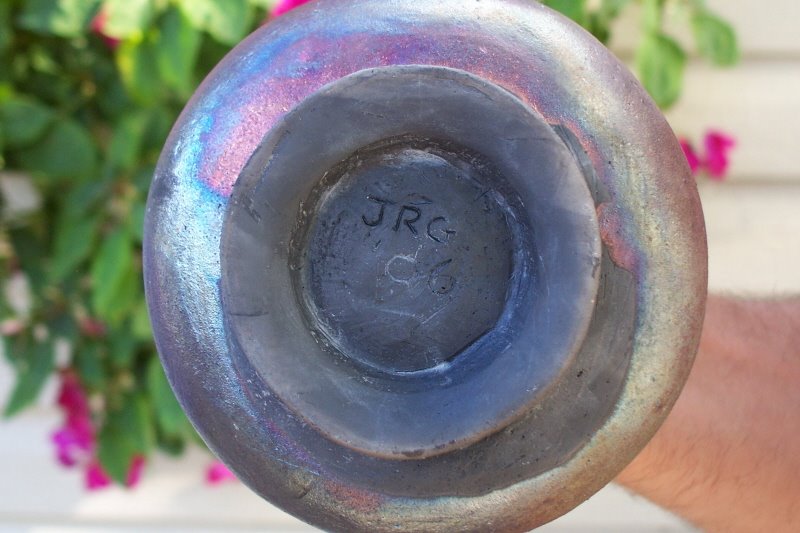
The Footring


On Chawan the foot of the bowl (Kodai, pronounced "koudai") receives a lot of attention and importance to not only the potter, but the collector or tea drinker as well.

First of all the footring is usually the only place that the claybody of the bowl can be viewed. A lot can be revealed by studying the the clay, in some cases where the clay actually came from. It also is a nice contrast to the smooth glazed surface.

A good footring should balance the bowl not only when placed down, but in the hands as well--it shouldn't be too small or too large for the chawan. And, the footring reveals much, if just studied. Turn the chawan over. Look at the foot. It should be spontaneous but also have the skill and confidence of the potter who created the bowl.

Friday, September 01, 2006

John's First Bowl


John's first bowl, Raku and Wood Fired. Yahoo!

I gave John an 8-pound brick of clay, a carving tool, a couple of wooden trim tools, a wooden rib, and told him to "go at it." I suppose I should have given him some guidance or at least explained to him how to use the tools, but everything worked out.

I also gave him a hard time about not helping with the wood splitting but I take that back, as John did more than his fair share of stoking the kiln in the hot afternoon sun. Next time we fire at night.

Congratulations John!

Saturday, July 22, 2006

Wood Fired Pottery

Ahh...
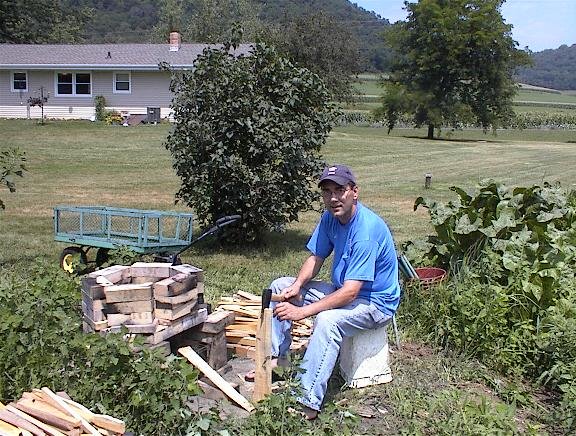
The great Joy of wood fired pottery. For the people who collect it or the people who admire it, they have it easy. Creating it is the hard part, I mean hard on the body--Uffda! I must say that I find no joy in collecting, sawing, splitting and stacking wood for 3 hours in near 100 degree heat. But, this is part of the process which ultimately leads to an insane adventure with fire and earth.

Tomorow I will be firing a few of my tea bowls which I hand carved from 8 pound blocks of clay, and one bowl that my friend John carved.

John has never made anything out of clay but has always been interested in my pottery and the processes involved with firing the pots. He has helped me modify my gas raku kiln and has come up with some great ideas for firing.

Anyway, I just handed him a block of clay and a few carving tools and said "there is a bowl inside that clay so use the tools and release it." I'm not sure how long it took him to carve the bowl but he did it and seemed to be quite pleased with himself. I was quite suprised, as I gave him no suggestions, help, or advise of any kind.
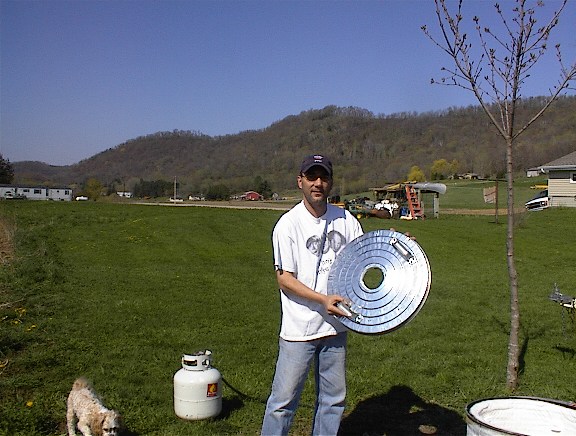
So we're both fired up about firing our pots, although I have to say that he gave me no help in sawing and splitting all the wood.

Friday, July 14, 2006

Raku Wood Firing


Raku Wood Firing--The First Step


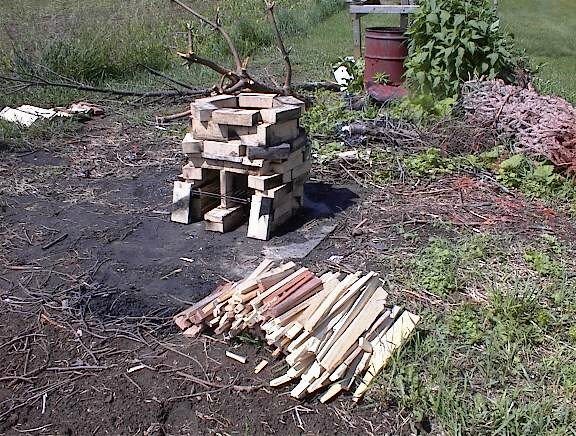
Yesterday I took the first steps in preparing for another Raku Wood Firing--gathering the wood. Fortunately I have a few sources for wooden pallets. They're free and all I have to do is go get 'em, saw the planks off them, and split them into small pieces. Sounds like a lot of work--scratch that! It is a lot of work and with the gasoline prices at 3 bucks a gallon I wouldn't be doing it except I can pick the pallets up on my way home from work.
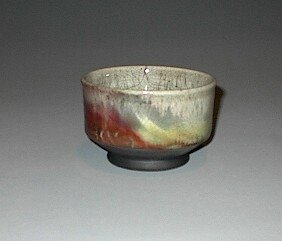
A bright spot in the day--Yesterday I managed to hook-up with another potter who is creating a links list of fellow blogging potters. Her name is Mary Anne Davis and her blog can be found on my list of links. She also has a wonderful web site full of beautiful modern ceramic table art. Go see her pottery, fantastic stuff. Better get going. I've got wood to split.

Sunday, June 18, 2006

Wood Fired Tea Bowl


Success! WhaaHoo! A Raku, Wood Fired, Tea Bowl. I love the red. The outside of the bowl has some real nice fire flashings of black.

Dimensions approx. 4 and 3/4 inches high and 5 and 3/4 inches in diameter.

Stay tuned for more tea bowls. I'm out of bisque ware to fire and I have to collect and split more wood.

Friday, June 16, 2006

Raku Kiln

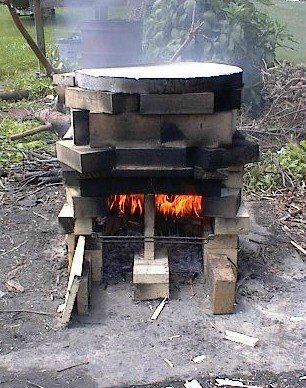
My first Wood-Fired Brick Raku Kiln. I got interested (more liked "Hooked") on Wood-Firing thanks to Tony Ferguson and his invitation to help fire his Anagama Kiln last
October (check out my blog archives for details). This kiln is basically Nesrin During's design that Steven Branfman describes in his book "Raku, A Practical Approach, 2nd Ed."

The main differences are that I used hard fire brick instead of insulated soft brick. And, instead of kiln shelves for the lid of the kiln I used a scrap piece of 2-inch fiber board.

Wood Fired Raku Kiln


I scrounged all my materials for this kiln.

I didn't have access or the money to buy a bunch of insulated soft brick so I used hard fire brick for my kiln, about 50 full and 10 split brick. The bricks are very loosely stacked and the fire box and firing chamber are one in the same.

I used an old refrigerator grate in the fire box to hold the wood, and the kiln lid is a scrap piece of hard fiber board that was given to me by a local furnace repair business.

The wood is from shipping pallettes that I get for free. I just have to pick them up and saw them up with a skill saw. I then split the wood into small pieces.

It takes approximately 3 pallettes and a couple hours to fire the kiln. I haven't yet fired another batch after the first initial firing but imagine subsequent firings would take about a half hour.

Sunday, May 07, 2006

New Raku Kiln Lid

Since I had some extra Kaowool, I decided to build a new lid for my raku kiln. Believe it or not, I couldn't find one store that would sell me just the garbage can lid. So, I had to buy the whole works again. I had heard from many sources that I should put the hole in the center, so I did. I cut the hole in the lid with a pair of tin snips, painted a coat of sodium silicate on the inside of the lid, set the Kawool in place and further secured it with 1-1/2 inch squares of rigid fiber board buttons threaded with nichrome wire.

New Raku Kiln Lid

I'm not sure if this kiln fires any more efficiently with the hole in the center. I didn't notice any difference in firing times for finished product. But one thing for sure---it is a lot easier looking into the kiln with the hole off-center. My favorite addition to the new lid is the two heavy-duty handles, which makes removal much easier.

Wednesday, April 26, 2006

Horse Hair Raku


My first Horse Hair Raku Tea Bowl.

Tuesday, March 21, 2006

Raku Teabowl


This teabowl has beautiful copper red flashings all around the outside of the bowl. The inside was glazed with a Clear Crackle Glaze. The outside was first glazed with the Clear Crackle and then glazed again with a Turquoise Crackle.

I think the clear glaze I use is Called Soldner's Clear Crackle. 80% Gerstley Borate, 20% Neph. Sy.

For the Turquoise Crackle glaze I just added 10% Zircopax and 2% Copper Carbonate to the Soldner's Clear.

Sunday, March 12, 2006

Raku Tea Bowl

Ferguson's Turquoise Crackle Glaze. Fired in heavy reduction during the last 10 minutes of firing. The turquoise has a nice soft crackle appearance and the copper red metallics are hard, brilliant, and shiny. As with most my tea bowls, the dimensions are approximately
3-3/4 inches tall by 4-3/4 inches wide.

Raku Tea Bowl


Turquoise Raku.
After about a dozen firings I am finally learning how to fire my new kiln and am very happy with the results I am getting. This turquoise glaze has become one of my favorites because it can produce a lot of different colors, depending on how the kiln is fired. Under normal firing conditions this glaze will always come out a blue turquoise. When the kiln is heavily reduced near the end of the firing the glaze will yield a crackled turquoise with multicolored metalic flashes. When the kiln is fired in heavy reduction throughout the firing process the glaze will be a shiny metalic copper, so shiny you can see your reflection in the glaze. I have also had this same glaze turn out the most beautiful oxblood red I have ever seen. Although, I have only been able to get that red once. But, I'm still trying.

Sunday, February 26, 2006

Raku In Wisconsin

Raku in Wisconsin
Early February
Well below Zero
All for a dozen test tiles
Crazy Huh?
Yahoo!

Raku Burner System

It doesn't look like much, but this is my Raku Burner system. It is called a "Big Bertha," model #166. It is made by L.B. White Co. Inc. in Onalaska, WI. Cost is approximately 80 dollars new. I borrowed this one from a friend of mine, but a good source for burners is eBay, under "weed burners." Real Cheap on eBay.
The burner consists of a torch head, an orifice, a handle or shaft, a manual valve, a hose and a regulator.
Thanks to LB White for the specifications and part numbers.

Model: 166 (Big Bertha)
Heat Output: 500,000 BTUH
Operating Fuel Pressure: 25PSIG
Hose: 550-20703 1/4 inch OD x 10 feet
Regulator: 550-21788 25PSI
Operating Pressure/Fuel 25 PSIG LP Vapor

Many thanks to Frank Colson who informed me that building a kiln without a burner system really is "Kiln Building For Dummies."

Tuesday, February 07, 2006

Tea Bowl Close Up


Nice Crackle Pattern.

Clear Crackle Glaze

70% Gerstley Borate

30% Neph. Sy.

Second Firing


Second Firing and I'm a "Happy Camper." I fired these with the help of my Friend John Roesler. Firing time was approximately 1/2 hour using a 20lb tank of propane. It was sunny and about 25 degrees out. Had no propblem with the tank freezing up. Oh! Thanks to Carol for the photos.

Sunday, February 05, 2006

First Firing

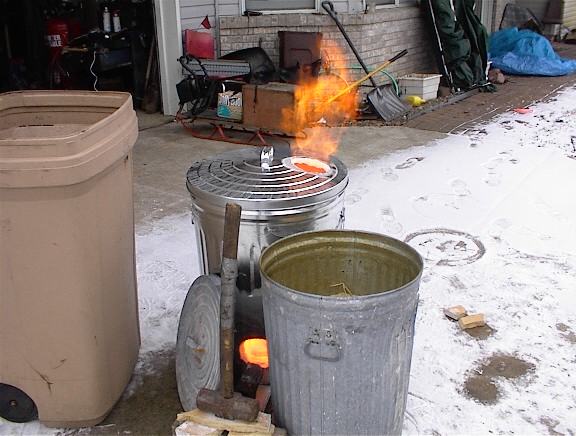
I had to fire my kiln immediately after completion. It was 24 degrees and pretty windy. In fact it was just cold and windy. The plastic garbage can helped to serve as a wind break. The sawdust filled reduction can and the lid served the same purpose. The sledge hammer was placed on top of the kiln shelf pieces to hold the burner in place.

In 25 minutes I was pulling glowing red tea bowls from the kiln and placing them in the reduction can.

The Finished Raku Kiln

To finish the kiln just cut out the fiber from the flue and the burner port. I used the utility knife and cut from the outside in, leaving about an 1/8 of an inch edged between the fiber and the metal.

If you have all the materials gathered together before you start, I think most people can build the kiln in about 3 hours.

I was firing immediately after completion.

Step 6--Attaching the Buttons

I thought this step was the only difficult part of the project. I drilled two small holes into the can for each button. It was threading the wire through the holes that was difficult. Once threaded I just twisted the wire tight with a pair of small pliers.
For the lid I threaded the wire from the outside of the lid, through the holes and through the fiber. I then just pierced the fiber button through the wires and twisted tight with the pliers. I trimmed the long ends with a pair of wire cutters. This was a lot easier than threading from the inside out.

Step 5--The Buttons

I scrounged a piece of fiber board from a friend of mine who worked for a furnace/AC repair place. Using a utility knife I cut out about 20 squares that measured 1-1/2 by 1-1/2 inches. The board was 1-inch thick.

I used High Temp. Wire, 8 inches long for each button. The wire I used was the thicker gauge wire made by Kemper. I think it was about 5 dollars for 10 feet of it. I bought 3 packages and only used one for this project.

Anyway, kind of bend the wire in half and gently poke the two ends through the fiber square. It goes through really easy. I actually only used 8 buttons for my entire kiln but might have to add more later. I used four for the kiln lid and four for the interior of the kiln. This seemed to work just fine for my first firing.

Step 4--The Kiln Lid

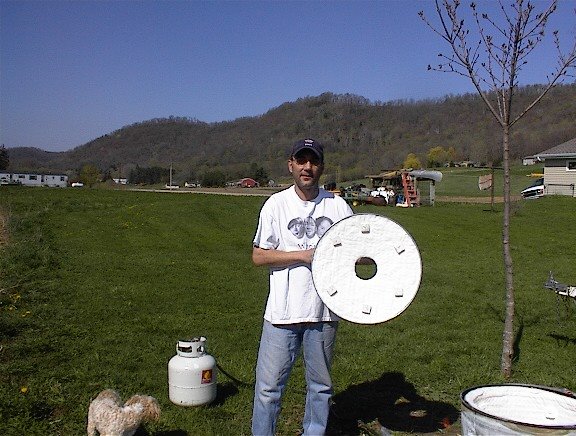
Using the marker, trace around the edge of the garbage can lid and cut out with the utillity knife. Turn the lid upside down and carefully tuck the fiber round into the bottom side of the lid

The fiber will be held in place by either handmade ceramic buttons with High Temperature kiln wire or by buttons cut out of insulating fiber board. I choose the fiber board because I had heard that the ceramic buttons tend to break after repeated firings.

A picture of my fiber buttons will be posted in the next step.

Step 3--The Kiln Bottom

This is the easiest part of building the fiber lined garbage can raku kiln. Place the can on the fiber and trace around the perimeter with a magic marker. I set the can on the edge of the end of the roll and the side. This allowed me to save about a 4 inch by 4 foot pieces of fiber for future use in some other project. "Waste not, Want not."

Cut two rounds pieces out for the bottom of the kiln. This makes it possible to use a single piece of fiber for the main interior part of the kiln. Once the pieces are cut, gently place each round in the bottom of the can, one piece on top of the other.